Showing posts with label reviews. Show all posts

Tuesday, June 30, 2015

length check (june 2015)

Posted by Yahya at 5:50 PM 0 comments
Since I haven’t been really growing out my hair, my length checks have been going through the same pattern—I record about three inches of growth then trim it back to waist-hip length. So this time around, I wasn’t very concerned about measuring and taking digital proof before trimming. I will say that my ends keep gradually getting thicker though, and my current length is now at 27 inches.

I can’t believe how much time has passed, I’ve now had 6 Japanese straightening touch-ups, 4 from Hair IB Club. I don't have much to say about my recent visit there, everything went along fine. I am still contemplating whether to start bringing my own wide tooth comb though. And speaking of how many JHS touch-ups I've gotten now, the sodium hydroxide relaxed parts of my hair are also now at the ends, roughly making up about 1/4th of my length.


I've been asked how I measure my hair, so here I'm showing how I do it when I want to take digital proof of it's length. Because it's hard to hold the measuring tape and take a picture from my back I clip it like shown and sweep it to the side.


Saturday, March 21, 2015

hair ib club (the language barrier)

Posted by Yahya at 2:42 PM 4 comments

November 29, I made my third visit to Hair IB to get a Japanese straightening touch-up. Again, the experience had its pros and cons, but the biggest con that stood out this time was the communication problems. This actually happened before the salon visit, not during. The salon’s site has a forum called freeboard as an option for clients to make appointments and ask questions. It’s well used and questions are responded to in a decent amount of time. I used the freeboard to make my recent appointment and, as a blogger that tries to document my experience as vividly as possible, this feature really benefited me. It was unplanned, I didn’t realize until after, but I was able to capture the full conversation between me and the salon. Instead of writing down what happened from memory, here’s the actual dialogue -just click.


Free Board


I don’t think I showed it, purposely trying to conceal it, but this conversation was kinda frustrating. Those of you have been following all my visits to the salon know about the past communication problems we have had. Example, miscommunication on how JBS works and using protection cream. Now you guys can concretely see what I’m talking about.


Turning on my critical mind (aka mild, intellectual, ranting)-
  • In the beginning I explained the type of protection cream I wanted to bring in and how it would be used because the last time, it turned out the protection cream they said they had was something completely different -a cream they put in the Japanese hair straightening solution to hinder damaging effects. When describing protection cream the first time I might not have been as detailed, but I know I said I wanted it so my already sodium hydroxide relaxed hair would be protected. Someone who spoke fluent English would have caught that and knew I was talking about a different type of protection cream. I would have gotten exactly what I asked for my first and second salon visit, a Japanese straightening with protection on my lye relaxed length. 
  • I don’t know why the salon receptionist kept saying “we only do JHS touch up” when that was exactly what I was asking for in my first post. I never said I wanted my previously treated hair to be reprocessed, I said the exact opposite. I guess it was the “It’s purpose is to hinder the JHS from penetrating the ends during the rinse” that they didn’t understand. The salon knows full well though that when they rinse the JHS solution off the roots during a touch up that it inevitably penetrates the ends (since they don’t use protection cream). I know, because they are careful to tell their clients that before they get a JHS service. So I blame them not understanding what I mean on the language barrier. 
  • I had used the term sodium hydroxide relaxed to describe my hair the other two visits, and never was told the salon had no idea what that was. I don’t think the salon is used to having customers that are hair knowledgeable. There are not ‘thousands of different kinds of relaxers,’ that's a complete exaggeration. I’m not even sure if there are thousands of brands of relaxers. There are 4 main types of relaxers. So those of you who are sodium hydroxide relaxed and want to take the risk of transitioning to Japanese straightening, this is not the salon to do it. 
So now you guys have a vivid example to see for yourselves. I still plan on going to the salon, because like I said in the third review, the salon tries their best to answer all questions and actively listens, doing all the extra things I want done on my hair. And now, I believe the language barrier has been penetrated and they now know how I want my hair done. Communication also felt like it went better when I went to the salon, so though they have freeboard, I recommend going into the details of what you want in person. If you're the type that believes you shouldn't go to a salon if the workers' first language isn't English, or if you're the type that easily gets frustrated and project it, this might not be the best salon for you.

Saturday, January 31, 2015

hair ib touch-up (third visit)

Posted by Yahya at 9:16 PM 5 comments
I know a number of you have been waiting for this post, sorry! On top of my part time job, I'm currently attempting 18 credits. Trying to juggle everything the best I can.

Almost two months ago, November 29, I made my third visit to Hair IB to get a Japanese straightening touch-up. Again, the experience had its pros and cons. The biggest con being the language barrier, which I will talk more extensively on with a following post. But all in all, my hair came out in one piece. It was the first time going to the salon and getting everything I planned on getting, a Japanese straightening touch-up with protection cream protecting my sodium hydroxide relaxed ends.

An overview of my salon visit:
  • I paid the extra $20 for them to put their form of protective cream in the Japanese straightening solution. I also brought my container of Milbon Straight Liscio Protection 30 Cream and they agreed to apply it the way I described. 
  • First my hair got washed, then my hair was detangled, rather badly. They were trying different tools, raking the combs from top to bottom. There was breakage, but luckily not as much as I thought there would have been. It was only when they eventually used the tangle teezer-like brush that detangling sessions got somewhat easier. Now that I have them protecting my ends the way I want, maybe detangling will be the next thing. 
  •  It took about an hour ( of sitting with an astro egg aroma on my head ) for my hair to process like last time. Not sure how to feel about that, but the girl was constantly checking my hair, playing with a strand to see how far in the process my hair was.
  • Before my hair was fully processed, the Milbon protection cream was heavily and thoroughly applied to the bottom half of my hair. I had also mixed the cream with Roux Porosity Control and grape seed oil, so that my hair cuticles were closed when the JHS solution was rinsed out. The salon workers even went the extra mile and agreed to lift the bottom half of my hair when first rinsing out the touched-up roots, and doing this by having one worker hold my hair up while another did the rinsing. They really try to follow the customer's wants and directions.
  • Unlike the other times, they blow dried then flat-ironed my hair instead of starting the flat-ironing on semi-damp hair. I was a little afraid my hair could revert, but my end results still came out nicely, and drying the hair fully before flat-ironing is less damaging. 
  • After the last blow drying and flat-ironing session, for the first time, they used some product and serum in my hair. Instead of having naked, dull-looking hair until I got home and applied some grape seed oil like the other times, I walked out of the salon with shine. 
Conclusion, though the salon has the ability to do afro textured hair, they are not kinky textured hair experts. They do not have proper detangling technique, lack understanding of the common relaxer ( will talk about this in follow up post ), and sometimes, I feel a little like an alien. When the girl finished blow drying my relaxed ends without product, she curiously asked if I flat ironed or what I usually do to my ends to tame the dryness and frizziness. Most of the other clients are Caucasian, white and east Indian. Unlike all the other clients, my hair seems to take big dramatic transforms. I think I get some curious eyes sometimes, which gives me... on the spot, mixed feelings. ( Aaw, they're curious. Wait, are they negatively judging me? Wow, the relaxed bottom half of my hair is so frizzy when blow dried and without any product, even I don't recognize it. If this is my reaction, what's theirs? )

The salon isn't perfection, but the most important part to me is that the salon knows how to apply Japanese straighteners with minimal damage to my hair, is friendly, cheap, and tries to do all the extra things I ask them to. This was also the best my hair looked coming out of the salon. It had shine, it wasn't stick straight because they blow dried this time, and my ends were even. I plan on going again for my next touch-up.

A salon review means a length check is coming up~

Friday, July 4, 2014

hair updates

Posted by Yahya at 3:54 PM 0 comments
GROWTH EXAMS
My life being busy the last couple months, I unfortunately discontinued the growth exams, sorry guys... plus, I kinda already had a bad start with it. I’m also going to take a break, and won’t be doing a season 3 right away. I might still use growth aids or practices now and then, but it probably won't be with proper recording.

STRONGER ENDS REGIMEN
I've been keeping up with my protein layering and stronger ends regimen, but adjusted it slightly to be more on the safe side. Instead of using protein every other week, like the protein laying pic shown above, I was doing it more every two washes. sometimes three. I feel my hair has benefited with it and will continue to use this regimen for more even strength throughout the hair strand. To protect and baby my transitioning relaxed ends, I had also incorporated other things in my regimen, which can be find listed at the bottom of this post. Despite my hair laziness the past couple months, I successfully added most of these practices, all but the ghe method, leave-in steaming, and continuing to test growth aids. My ends still need tlc as they grow out, but my efforts so far are showing.

TOUCH UP AT HAIR IB 
Two weeks ago, June 18, I went to Hair IB Club to get a touch-up. This was my second time going to this salon. This time, instead of getting the japanese brazilian straightening , I got the normal japanese straightening. I decided not to do the JBS because I didn't feel like the extra cash was worth it. And though I had no noticeable adverse effects, I'm also still not perfectly sure how I feel about the absence of neutralizer lotion in the process. It seems like a good idea, but I like to fully understand the science behind what's happening on my head, and there's holes in my understanding of JBS.

With my second Hair IB experience, I have updated pros and cons about the salon. One, is that the salon apparently does not use protection cream. The first time I interviewed them and asked they said they did, but apparently we had a misunderstanding. The protection cream they were talking about was an extra solution they mix into the Japanese straightener for $10-20 more. This caught me off guard when I was at the salon for my touch-up, as I've been very cautious of my ends. Was all the tlc I was giving them going to be ruined in one day? I asked them if they could put conditioner on my already treated hair to create a barrier, and if they could lift it up my hair and wash the roots out exclusively first to keep the JHS from rinsing into my ends. They did, but my ends still took a toll. nothing significant like disintegrating, but noticeable damage I would have to trim (I would have to trim off my thin ends anyway) and work back to health. This makes the salon lose a few points, next time I'm going to see if I can bring in my jar of protection cream.

On another note, in addition to adding their 'protection cream' into the Japanese straightener, they used a weaker JHS formula on my roots. I'm not sure whether to consider this a positive or negative however, since this made my processing time double. The stylist said this was fine, but unless I'm given a good explanation to back things up, I'm hesitant to wholeheartedly believe. The last thing that was different this second visit, was that my hair didn't end up stick- pin- dead straight like last time, and actually had some volume. This was likely from only doing a Japanese straightening touch-up, and not getting the JBS. I liked how my hair tuned out more this time. If I'm recalling properly, my hair also didn't feel as dry as last time.

LENGTH MEASUREMENT
Above is a picture of my hair, right after my touch-up and before I trimmed at home. As you can see the ends are stringy, but the hair that's growing out is thickening nicely. At first I self-trimmed an inch off by banding, but wasn't satisfied, and trimmed another inch and a half in the shower. I only recommend trimming in the shower if your hair is straight or has just been straightened. I haven't taken an after trim picture yet, but I measured after, and if memory is right I'm currently 25 inches. Remember, I'm currently not growing my hair out, and plan to keep my ends in the same area until my relaxer fully grows out.


Saturday, June 21, 2014

trader joe's (nourish spa) new & old formula

Posted by Yahya at 2:17 PM 0 comments
Hello everyone! It feels like it's been forever since I've posted, my life has been quite busy. That will hopefully change now that I'm finally on summer break. I've gotten very lazy with my hair, too. Not so much neglectful, but I've really been doing 24/7 protective styling and been doing a lot of short wash days. I know I have a lot of things I have to update on, but today I wanted to talk about my favorite conditioner: trader joe's nourish spa!
NEW FORMULA
(or rather, 'changed' formula)

The company has changed the conditioner's formula. I'm probably late on this subject, I think they changed the formula two months ago. When I first saw they changed it I was a little worried, I was thinking 'first herbal essence's hello hydration, now this'. Researching the topic online, I saw a lot of girls were also worried, so worried that they were protesting to have the conditioner changed back without even trying the new one. I was worried, but I wasn't that upset, and picked up a bottle of the new conditioner last week. Here's a comparison of the old and new ingredients:

old formula - purified water, rosemary oil, orange citrus, mango, lemongrass, ginkgo biloba, Echinacea, willow bark, sea kelp, chamomile flower, textured soy protein, lavender, grapefruit citrus, vitamin e, acetamide mea, cetyl alcohol, cirtic acid, methylparaben, propylparaben, fragrance

new formula - purified water, cetyl alcohol, behentrimonium chloride, citric acid, vitamin e, dimethicone, argan oil, rosemary leaf extract, orange citrus, mango, lemongrass, ginkgo biloba, Echinacea Angustifolia, willow bark, sea kelp, chamomile flower, soybean seed, lavender, grapefruit citrus, acetamide mea, phenoxyethanol, potassium sorbate, fragrance

Now here are some things to note...
  • Not too much has changed, the ingredients in italicized are the same and in the same order. There are also same ingredients that have just changed position in the ingredients list, for example, cetyl alcohol, vitamin e, and cirtic acid.
  • I think the main reason the company decided to change the formula was to add argan oil, which has been very popular lately. They even changed the front label to mention argan oil is an ingredient.
  • Some of the new first ingredients, like behentrimonium chloride, might not look too attractive to some. But despite it's scientific, chemical-looking name, it's plant-based. according to the blog honesty, it "conditions, detangles, fights static, softens, restores, and rebuilds damaged hair. since it’s plant-based and not petrochemical-based, it doesn’t coat but penetrates the hair shaft for potent conditioning effects. (In some applications, it also acts as a preservative)." The site also mentions that there is misinformation about behentrimonium chloride, people mistaking it as unnatural.  
MY EXPERIENCE
So really, there hasn't been much of a change to the product. I've only tried the formula once, and so far my hair hasn't been able to tell the difference. I worry a little bit about the dimethicone, (which some healthy hair girls have a problem with because it can accumulate on the hair is not washed out properly) but it isn't that big a deal to me. I understand what some girls went crazy and got worried but the conditioner's sudden change, but I would advice at least trying it first before complaining to the company to change. It might even be better then the old formula.

Monday, April 21, 2014

roots-only applicator review

Posted by Yahya at 9:22 AM 0 comments
I’ve been using the roots-only applicator a lot recently and it’s really been helping me out on my stretch. What is it? Instead of the typical applicator with one nozzle, the roots-only applicator has many nozzles in the shape of a comb like in the image shown. This makes applying product to the scalp much easier. You just press the tips of the nozzles against your scalp and gently squeeze the bottle as you comb your roots. I often use it while my hair is in a bun or ponytail.


As you can see from the pic, the bottle size is rather small. The applicator, however, can unscrew and fit on other, bigger sized bottles. I have several bottles that the roots-only nozzle fits, so the thing is always getting traded around. I use the roots-only applicator for applying growth aids, shampoo, and tea directly to my scalp.
  • growth aids - When applying things like sulfur oil with a normal applicator nozzle, you usually have to part your hair before applying for even distribution. This process can takes about a half an hour, but with the roots-only nozzle, it only takes five minutes!
  • shampoo – The key to healthy hair and growth is a clean scalp and moisturized hair. For us dry haired girls, shampooing our hair too often can dry it out, but we also shouldn’t neglect our scalps. This is why when shampooing the proper technique is to focus on massaging the shampoo in your scalp and then using the suds to gently cleanse the rest of your hair. The roots-only applicator takes this another step further. It makes cleansing your scalp more precise, allowing less product to be used. Also, there’s less shampoo suds to rinse through your hair, making it like a cowash. This is a good way to keep your new growth from drying out and tangling.
  • tea – I’ve been using black tea more often to combat shedding. Most girls use it by doing rinses, but since shedding takes place in the scalp I’ve been using the roots-only applicator to coat my scalp more effectively. When I want to use my indian powders, and want to minimize their strengthening or drying effects, I’ll also make them into a tea and apply them with the roots-only nozzle.
Bottom line, this applicator is very useful and makes life easier.     

Wednesday, February 26, 2014

my top 5 cheapie conditioners

Posted by Yahya at 7:16 PM 0 comments
The title might be a little misleading because not all the conditioners I'm listing are exactly "cheap" per say. The price range going from $1 to around $10. When healthy hair journey girls say cheapie conditioners, we're usually talking about non-expensive moisture conditioners we mix with other things (like homemade deep conditioners or leave-ins) or for cowashing. The following conditioners are ranked by price, quality, and accessibility. They're not exactly ranked from my least to most favorite, but by how significant they are to my regimen.

5. AUBREY ORGANICS WHITE CAMELLIA

  • price : $10
  • quality : 3 out of these 5
  • accessibility : Only available during my odd visits to Vitamin Shoppe
  • review : I bought White Camellia after finishing and being wowed by Aubrey Organic's Honeysuckle Rose conditioner. It was good, did what it promised, but didn't quite meet my expectations. It's a great conditioner, left my hair with a great fragrance, but I feel that Trader Joe's Nourish Spa is slightly better and with a much cheaper price. It's a conditioner I only used once, but might buy again on a whim.

4. V05 CONDITIONERS 
SUAVE ALMOND AND SHEA BUTTER
  • price : $1-4
  • quality : 1 out of these 5
  • accessibility : V05 is available at just about any dollar store and beauty supply; Suave at any pharmacy or department store
  • review : V05 and Suave's conditioners are like the representatives of cheapie conditioners. you really get your bang for your buck. Suave might seem not that cheap, but it is when you consider the size of the bottle. I hardly ever use them alone, but use them in recipes in association with one of the other conditioners in this list. They're like helpers.

3. AUBREY ORGANICS HONEYSUCKLE ROSE
  • price : $10
  • quality : 5 out of these 5
  • accessibility : only available during my odd visits to Vitamin Shoppe
  • review : The greatest conditioner in the world. No, I'm not exaggerating. the only reason it's lower in the list is because it's on the expensive side compared to the others. When I use it I feel like I have to use it sparingly, and I don't like that feeling. I don't keep this conditioner on hand, But it's my go to when I feel like my hair is leaning into protein overload or needs some kind of saving.

2. TRADER JOE'S NOURISH SPA
  • price : $2
  • quality : 4 out of these 5
  • accessibility : only available at Trader Joe's, but I go to the grocery at least once a month.
  • review : Not the greatest, but my favorite, does that make sense? It's just so cheap and great quality at the same time! And it's easy to get my hands on. The only problem that makes it imperfect is one ingredient: organic textured soy protein. It's not like I'm one of those girls that's so afraid of protein that I won't use anything with protein in it. It's not like the ingredient is high in the list. And it's not like the protein is hydrolyzed, so it can't properly stick to the hair after being rinsed. But that one ingredient just restricts me sometimes. For example, I'm afraid to use it in my kimmaytube leave-in because the protein isn't being rinsed and can accumulate on my hair. Another example, I'm afraid to use it the week after a medium or heavy protein deep conditioning.

1. HERBAL ESSENCE HELLO HYDRATION
  • price : $5 (update: price increased to $9 around my local stores)
  • quality : 2 out of these 5
  • accessibility : available at just about any pharmacy, department store, and beauty supply store
  • review : My third favorite, after Nourish Spa and Honeysuckle Rose. just like Nourish Spa, it's easy to get my hands on and so cheap for it's great quality. The quality might not by as good as Nourish Spa, but it only has moisture ingredients. Well, coconut can kind of be considered protein. It's also a big bottle for it's price like Suave, But last time I went to Walgreens I didn't see the normal 23.7 fl ounce bottle again, but a smaller one the same price. Did herbal essence increase the prices for each bottle size, or was it just that walgreens? I sure hope not. This conditioner was my most recent addition to my regimen, we were just becoming good friends. 


Saturday, December 28, 2013

hair ib club (salon review)

Posted by Yahya at 11:23 PM 8 comments
I hope everyone had a merry Christmas! I'm so glad to finally be on break, and all the hustle preparing for the holidays are over. Last time I announced I would finally be getting my new growth done at a new salon: Hair IB in New York. I also said I would be trying their unique Japanese Brazilian straightening treatment. So how did it go? Here is the long awaited review and my touch up results.

FASHIONABLY LATE
I set my appointment Wednesday morning so there'd be less people and better focus on my hair. But then my driver came late... and then there was unexpected traffic, even though it wasn't rush hour... I ended up getting there, about an hour late? Luckily they didn't mind and there was only two other clients there. If I came in the evening or on a weekend it might not have been the same story. So the first thing they did was look at my hair, asked questions about my lye relaxed length, and showed me a chart to decide what strength of Brazilian keratin they'll use. Here's how the chart looked like:

Type A 
  • brand: Hair Go Straight 
  • price: $100 (any hair length) 
  • formaldehyde: yes 
  • straightens: 50% 
  • maintenance: must wait 3 days to wash 
  Type B 
  • brand: Lasio and Coppola 
  • price: $140-$160 
  • formaldehyde: yes 
  • straightens: 50-70% (don't remember, and it's not on the site) 
  • maintenance: must wait 3 days to wash 
Type C 
  • brand: Salon Tech Straightening System 
  • price: $160-180 
  • formaldehyde: no 
  • straightens: 90% & up, a lot more shine compared to type A & B 
  • maintenance: can wash right away 
Type D 
  • brand: Brazilian Blow Out 
  • price: $180-$200 
  • formaldehyde: no 
  • straightens: 95% & up, shine is similar to type C
  • maintenance: can wash right away
They recommended that I get type D because of the extremity of my curls, but to me that would have been too much. My ends are already relaxed, why did the extremity of my natural curls matter? I understand type D was also the best quality, but did I really need a 95% curl reduction? I saw from the start they did consider health, but were looking to make my hair stick straight (something I don't particularly like). I might have considered it, but then it cost $20-30 extra, while the other Brazilian keratin types had the fixed JBS price. So I decided to get type 3, the best bang for my buck, and apparently no formaldehyde.

LANGUAGE BARRIER
There were only two fluent English speakers, which made it a little hard to ask questions, but they did answer all of them. Most of them do understand English, but are not fluent. Of the two English speakers was an young Asian girl and a Caribbean-Hispanic wash girl. So for the first step, I got my hair thoroughly washed and detangled. One big concern of mine is having my hair detangled by people not use to kinky curly hair. Plus with Japanese straightening the hair has to be detangled to the point of a fine tooth comb. But they did a decent job, there wasn't much breakage. There could have been less breakage if they started using the fine tooth comb from the ends up and not the middle up, but I was satisfied. Their success was not so much in their technique, but it looked like their tools. They used a brush that looked similar to a tangle teezer.

JAPANESE BRAZILIAN STRAIGHTENING
After detangling the smelly Japanese straightening solution was applied to my new growth. Did I ever mention Japanese straightening smells like rotten alien eggs? They also corrected the parts of my hair that were under processed from last time. But then they wanted to wash out the solution. (Wait, huh? Weren't they going to put the Brazilian keratin on my previously treated length, too?) Turns out the process was different from what I imagined. The Brazilian keratin is applied on the entire head after the Japanese straightening is rinsed. The Brazilian acts as a neutralizer, strengthening treatment, and gives the processing roots straighter results. With this process the hair also only needs to be flat-ironed once, not twice. 

- - - - - -  - - - - - - - - - - - - - - - - -
Remember, Japanese straightening doesn't break the hair the same as relaxers do. If you need a little recap or if this is your first time hearing this, visit here and here. With the relaxing process, the sulfur bonds are broken and turned into lanthionine bonds. The hair is neutralized and that's the end of the straightening process, the hair has taken a new permanent form. With Japanese straightening the sulfur bonds are only temporarily broken, or rather separated. The neutralizer's purpose is only to help stabilize the hair's new shape, not to wash out the solution. This is why using the Brazilian Keratin as a substitute for a neutralizer is safe, and a pretty smart idea they came up with. Before becoming popular in the natural hair world, the Brazilian keratin was intended to be used on chemically treated hair, for straightening and strengthening, but relaxed heads didn't want to spend so much money to straighten their already practically straight hair.

The last thing I'll say before continuing with my salon day story is that this process, JBS, sounds like a better option for super kinky haired girls looking for definite straight results when they Japanese straighten.
- - - - - -  - - - - - - - - - - - - - - - - -

I quickly juggled the pros and cons of the process and realized the only, but serious bad part was that I was going to be rinsed off with no protection. They said online that they'd apply protection cream if they thought my hair needed it, I reminded them that, but they said my hair didn't need it. (Wait, what??) I've been dusting more often, didn't have many split-ends, but my ends did have noticeable wear at the time. I mean, relaxed and Japanese straightened is one of the worst combinations. The two don't go together. I was still trying to process everything when I was getting rinsed. I asked the wash girl to (at least) lift my relaxed length and first focus on rinsing out the Japanese straightening solution, but she said she can only follow orders and I had to ask a higher up. Hard to do that with your hair already soaked in the sink. At the time I didn't worry too much about it though.

They did a great job with processing my new growth. The woman had been checking often to make sure I wasn't over processing. After coming out of the sink my hair was already straight, but not over processed. The Brazilian keratin was then applied throughout my hair, from my just processed roots to my relaxed tips. This was my first Brazilian keratin, and I wasn't expecting my scalp to start burning like a lye relaxer. It wasn't burning that much but I forgot how a burning scalp felt. I got so spoiled on Japanese straightening that I forgot chemical straightening can even burn. She took me to a corner of the salon behind a curtain and opened the back door that was there. She also gave me a cloth to breath in. I knew Brazilian keratins had smoke, but wow, I really forgot how intense chemical straightening can be. You might be thinking, well Japanese straightening is a long complicated process, but it's not intense in the same way. There is no smoke or burning to remind you you're working with chemicals. I kept my face under the cloth for protective measures, but there really wasn't a smell or eye burning or anything. just some smoke. There are many Brazilian keratin brands that lie about not having formaldehyde, but I think the absence of eye irritation confirmed it was formaldehyde free.

The blow dryer setting wasn't too high, it felt between medium and hot, but the blow drying process was long, about a half an hour. Again, this was my first Brazilian keratin, so if something was amiss, do comment and tell me. After that my hair was flat-ironed, and I was impressed with their technique. Two different flat-irons were used, one on high heat and a healthier paneled one with lower heat. The first one was used on my just processed roots and the other one on my previously treated hair with one pass.

And then, I was done!

FINAL THOUGHTS
Thew~ this post turned out much longer than intended, but I didn't want to leave anything out. The whole visit took about 4-5 hours. (Near the end I was starving and thought I smelled fried chicken... turned out it was the flat-iron emphasizing and mixing with the extraterrestrial egg scent, lol >_ _<)
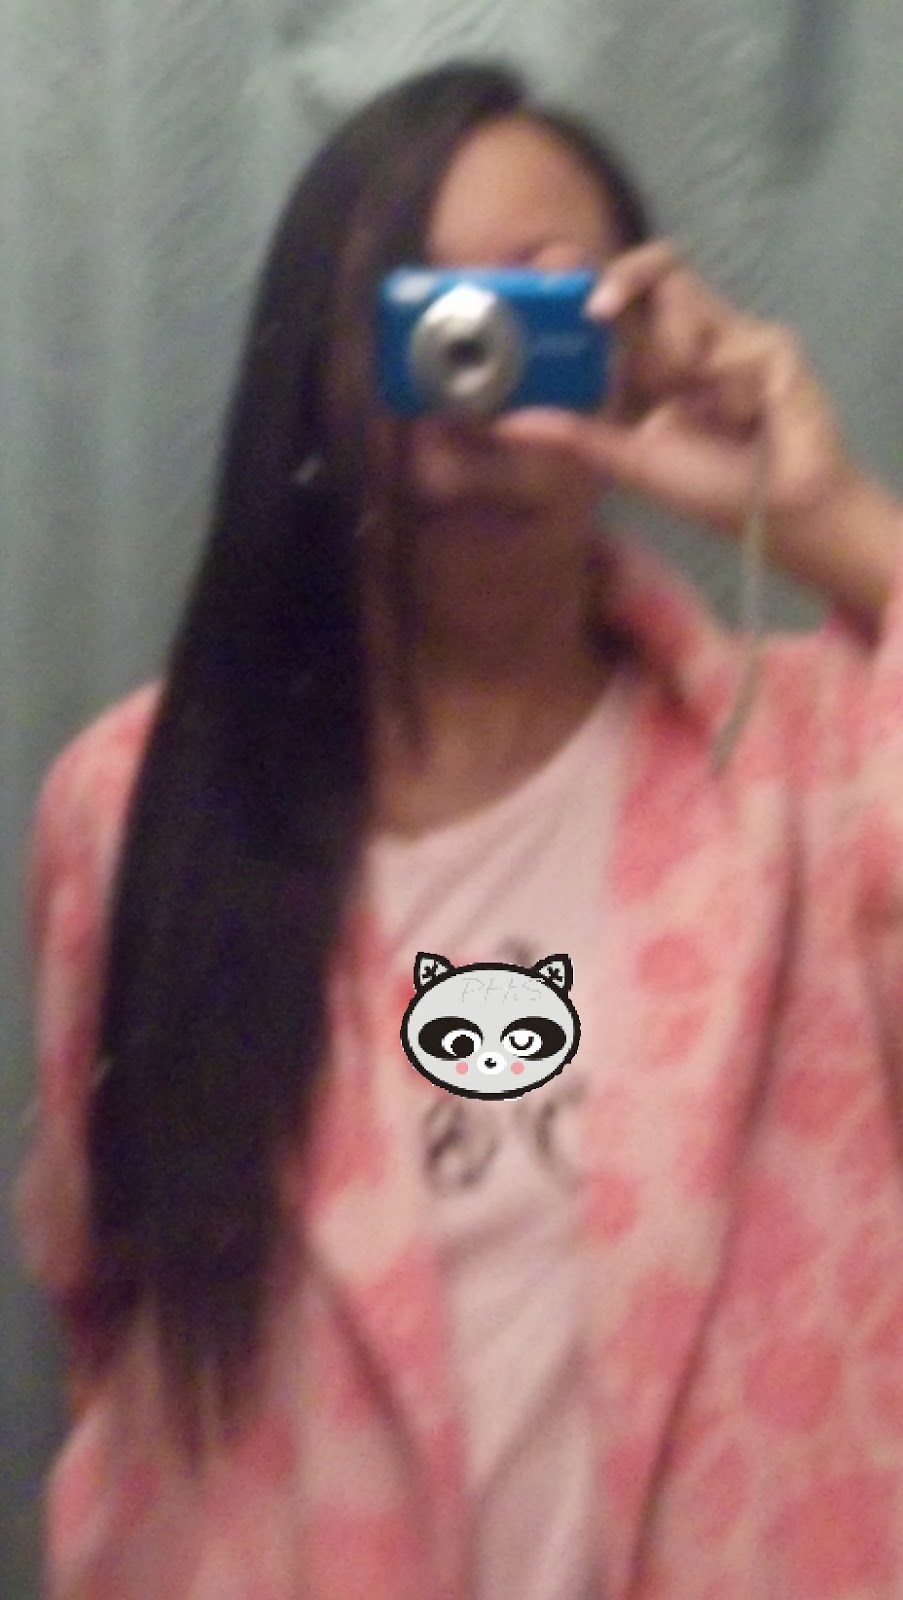
Now I have, 
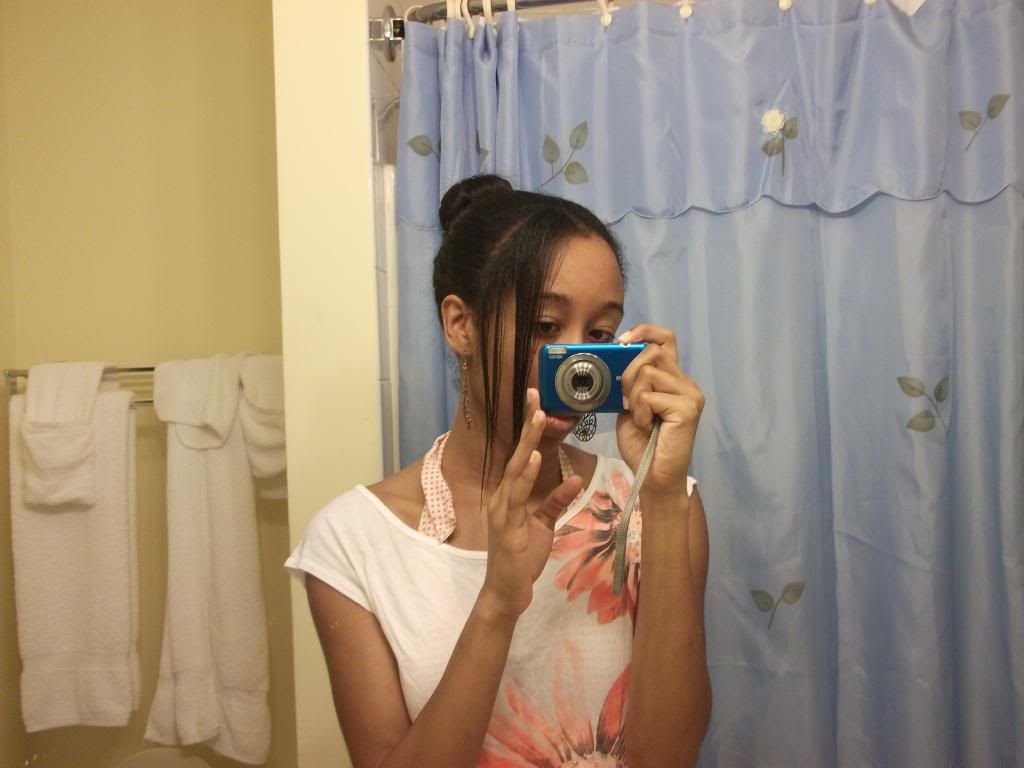
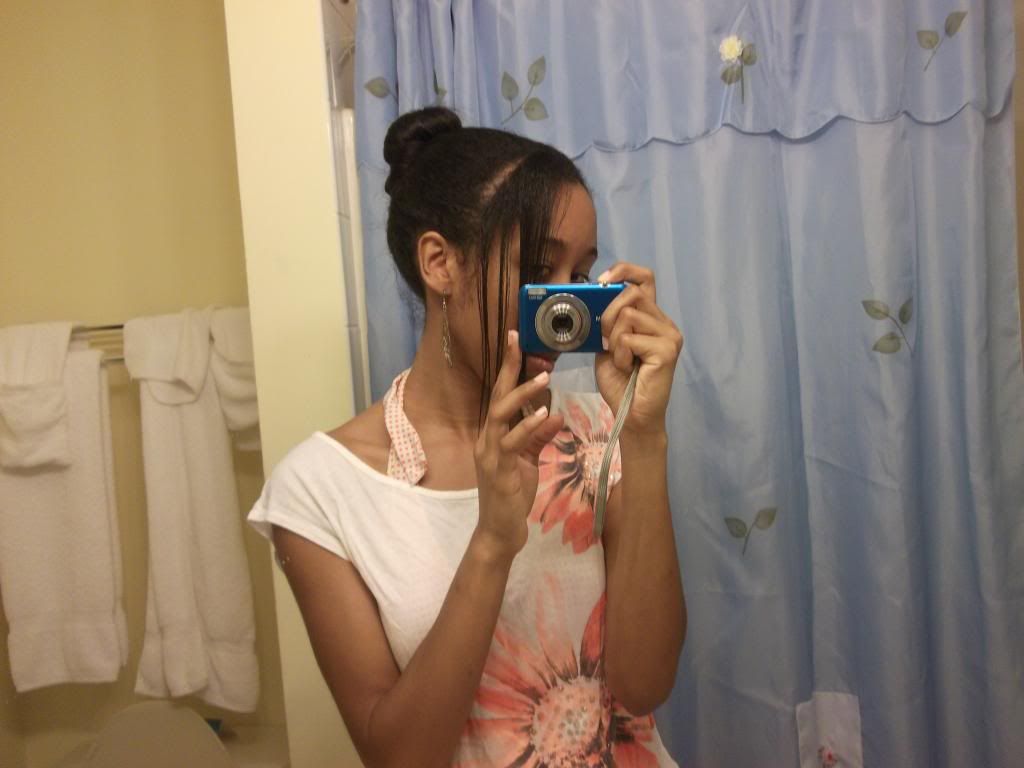
give or take, 10 inches of Japanese straightened hair. Some areas were longer, I really should have measured my new growth before the touch up. So is Hair IB club a keeper? I think so, but their only but fatal flaw was, again, not caring enough about my relaxed ends. I fell like I shouldn't have told them my last relaxer was a year and a half ago and that I had usually relaxed 3-4 times a year. It might have given them the wrong idea. If I go there next time, and probably will, I'll make sure they take better protective measures.


My hair was very dull in the shine department coming out of the salon, at first I was disappointed I didn't get that Hair's Talent shine. At home, however, after just applying a little oil, there it was! It was just hiding, since there was no product in my hair. And then after my first wash, a simple shampoo and conditioning, the shine really kicked in. I don't think my hair has ever had this kind of shine. I don't think the picture does the shine justice.

Thursday, December 12, 2013

picking out a new JHS salon

Posted by Yahya at 8:00 PM 5 comments
For the past week I've contacted a couple hair salons, wanting to get my hair touched up before the holidays. The first time I Japanese straightened I went to Hair's Talent in Connecticut and they were exceptional, but that came with a high price tag and it was quite a commute. The second time I tried home Japanese straightening. It was much much cheaper and the results were decent, but I did get a little under-processed. It was my first time doing a self touch-up, and I might try home Japanese straightening again in the future after I grow out my relaxer. 

So after contacting different salons, Hair IB in New York looked the most promising. They location is reasonable closer, and they're cheap. Their Japanese straightening service has a definite price of $150, the common price for JHS among salons is usually around $300. I made an appointment for their earliest slot on Wednesday. On Yelp one person recommended coming early on a week day so that they are less busy and put more focus on you. below I've listed the good and the bad when making this decision.

PROS
  • have pictures of afro textured clients
  • have good reviews on yelp
  • answered all my questions with the most care and detail out of all the salons I contacted
  • will do a hair consultation first
  • told me they can work with relaxed hair, but only with their JBS treatment
  • cheap
CONS
  • their cheap price comes from working on several heads at the same time, but hopefully coming in early and on a week day will eliminate this con
  • most of the stylist are Asian and don't know fluent English, but I did ask for an English speaker to be there during my appointment
  • from the reviews, they don't trim, they cut.   
 

I mentioned that they will only do their unique Japanese Brazilian Straightening (JBS) on relaxed hair. What in the world is? Talking to them, they said they will not do a Japanese straightening touch up on a head with relaxed hair, because the "product inevitably touches the ends of one’s hair during the course of root touch-ups". I'm not sure if this statement is 100 percent accurate. It kinda depends on how the straightening solution is rinsed out, but they do have a point. You can avoid the chemical touching your ends if your hair is long enough, but the previously treated hair close to the processed roots will get touched. A JBS seems like it's suppose to eliminate this, the roots are Japanese straightened and the already chemically treated hair is given a Brazilian keratin at the same time. It makes sense that these can be done safely at the same time as Japanese and Brazilian treatments do have similar procedures, and Brazilian keratins are compatible with pretty much everything. This will be my first time doing a Brazilian keratin treatment.

So I guess the Brazilian keratin acts as a strengthening and coating when the Japanese straightening solution is rinsed. After consultation they said they would also use a protection cream depending on my hair results. All of this protective methods does make me feel safe, but if it wasn't for the reviews saying the salon is very honest with their recommendations and will even tell you when you don't need something, I would wonder if they were just trying to get more money out of me. They also will not do a Japanese straightening on a head that doesn't pass consultation. I'm glad for that, but hopefully me, with my previously relaxed hair, does pass. I only have minimal breakage from the line of demarcation, but remember, my hair is relaxed, Japanese straightened, and long--so old. That's a lot of wear.   

So wish me luck! 

( update: It seems we had a misunderstanding and the salon is in fact willing to do a normal JHS touch-up on a head with previously relaxed hair.What they meant was that only with a JBS can they treat all my hair. A JBS is also not done in the manner described here. Click here to see the update. )

Saturday, October 19, 2013

clear rinse review

Posted by Yahya at 5:12 PM 2 comments
WHAT'S A CLEAR RINSE?
A clear rinse is used to prolong and give back life to color treated hair. Think of it like the clear coat you paint your nails with after the colored coat. It's like a color rinse or semi-permanent dye, but clear. It coats the hair and is completely safe to use, having no unhealthy chemicals. It works best with any type of chemically treated hair as it was designed to work with dyed hair and acts like a porosity corrector. 

BENEFITS
In a way, you can say a clear rinse it like the ultimate oil. 
It does everything a hair oil can do, but ten times better.
  • acts like a mild protein treatment and porosity corrector because it coats the hair strand.
  • really silks your hair, giving it a healthy shine.
  • helps reduce frizz and really smooths your hair stands, which leads to easier detangling. 
  • helps keep your hair's health in the condition it had before the rinse; this is why it's good to do a clear rinse when your hair health is stable, as it'll help keep it in stable condition, locking in your current moisture/ protein balance. 
  • it's literally like a coat for your hair, protecting it from the weather.  

REVIEW
Trying out clear rinses is something I've been planning to do for a while. I finally got to doing it my last wash, and boy do I wish I had tried it sooner! Usually I don't do reviews on things so quickly, but I loved it so much. it made my new growth and relaxed hair so smooth. My relaxed hair looks like it was flat ironed without the volume loss, and it camouflages better with my Japanese straightened areas. It really gave my hair a natural looking shine and smoother feel, this is definitely something I'll be keeping. 

The cons is that it kinda tangled my new growth during the process. My new growth wasn't properly detangled when I applied the clear rinse, and after it sat on my hair for about 15 minutes my hair felt more 'structured'. Because of this there was more tangles I got more breakage. On the positive it did help reduce my growth's frizz and the tangles only occurred during the rinsing process. Next time, I'm probably only going to apply it on my chemically straightened hair.

Since this review is so early, I'll make a part two that will probably includes before & after pictures and how long the clear rinse lasts. I also used aveda's black malva conditioner before the rinse to see if it makes the color last. I'll also be writing about this in part two.

( I completely forgot to take pictures, 
but had luckily took one for a different reason. )


( FIRST CLEAR RINSE ) WASH DAY
  • I waited to use it after my hair was in the most stable health. And that's what really happened as during the wash I only last a couple strands of hair, that's the smallest amount of breakage I ever got while so long in my stretch. 
  • I moisture deep conditioned on dry hair with a random mix. Can't remember what I put in it, but I did use a little Hesh Rose Petal Powder. Something new I just bought at the Indian market as I was restocking on Vatika Coconut Oil. I then steamed for 30 min, but it stayed on my head for another 2 hours out of laziness. 
  • I shampooed with my last bit of Hairveda Shikakai Swirl. 
  • I then used my Aveda Black Malva conditioner alone for the first time, and that had ended up sitting on my head for 3 hour mostly due to laziness, too. 
  • After rinsing it out and toweling drying, I used Jazzing's Clear Rinse for 15-20 minutes. 


Friday, July 19, 2013

pre-pool (how to prep hair before swimming)

Posted by Yahya at 11:15 AM 1 comments

PROTECTING YOUR HAIR
chlorine and salt water can be very damaging to the hair, they cause dryness and increase porosity. but this doesn't mean you have to skip out of the fun of water during the summer! there's a proper way to prep your hair to help shield it and minimize the damaging effects of chlorine and salt water.


this is just like a pre-poo treatment, except you saturate your hair in fresh water before you apply your oil or conditioner. simple, right? think of the hair cuticle like a cup with a sponge in it. if you go straight into chlorine or salt water the sponge will absorb that damaging water, but if you pour fresh water first the sponge will absorb that and there'll be no room for the damaging water. putting a layer of oil over the sponge will make it even harder for salt/chlorine water to penetrate. that's why I prefer to use oil, rather than conditioner, to prep. it also helps to make sure your hair's porosity is low as it'll make it harder for water to penetrate your strands. remember,

WHAT DO I USE?
I was on vacation to Cayman Island a few weeks ago. I decided to use my miniature luster's pink glosser spray as my pre-pool oil. and I rather liked it, it seemed to get the job done. in the future, when this runs out, I'm going to try to use shea butter oil or other products with shea butter. I choose luster's pink glosser because...
  1. I had it left over from when I first started my hair care journey and wanted to get rid of it 
  2. it was small and convenient sized
  3. though it says it's non greasy, but from my memory it was greasy but light
  4. it had shea butter in it. in my past experience, using shea butter in a deep conditioner left a very heavy barrier on my hair, like 5 times the power of a sealing oil. it was so bad that it felt like the shea butter prevented moisture from entering my hair, and I hadn't even used much of it in the deep conditioner!
  5. the ingredients look pretty good: C9-11 Isoparaffin, C14-16 Normal Paraffin, Isoeicosane, PPG-14 Butyl Ether, PPG-40 Butyl Ether, Shea Butter Extract, Vitamin E, Jojoba Oil, Wheat Germ Oil, Kola Nut Extract, Eucalyptus Extract, Aloe Extract, Papaya Extract, Chamomile, Henna Extract, Lemongrass Extract, Hydrocotyl Extract, Safflower Oil, Castor Oil, Mink Oil, PPG-3 Benzyl Ether Myristate, Ethylhexyl Dimethyl PABA, Fragrance, Benzyl Benzoate, Hexyl Cinnamal, Benzyl Salicylate, Citronellol, Amyl Cinnamal, Butylphenyl Methylpropional, Eugenol, Hydroxyisohexyl 3-Cyclohexene Carboxaldehyde, Hydroxycitronellal.
so after applying my pre-pool products, I usually tie my hair in a single indian braid or a high bun, it depends on how active I'm going to be in the water. here is a picture of me in Cayman Island, before  heading to the jacuzzi.


Friday, March 29, 2013

my vatika coconut oils

Posted by Yahya at 6:41 PM 1 comments
Coconut oil is one of the most popular, if not the most popular, hair oil used by healthy hair journey girls. Why? Coconut oil is commonly mistaken as a moisturizer, but in reality oils can not moisturize the hair because oil is not water soluble. How can something that doesn't contain water moisturize the hair? Moisturize means adding moisture--the presence of water. The reason coconut oil is commonly confused as a moisturizer is because of it's unique properties. Out of all the oils, coconut is the most penetrating and nourishing, the closest thing to an oil being moisturizing.

Another unique benefit of coconut oil is its ability to retain the protein in hair. This is great for anyone with chemically treated hair. This is because protein is lost during chemical processes, especially with hydroxide relaxing. Regular protein treatments must be done in order to restore our hair's keratin and using coconut oil helps make the protein fillers last longer.

There are two brands of coconut oil I use: Dabur Vatika Coconut Oil and Hairveda Vatika Frosting.

vs. 

DABUR VATIKA REVIEW: You can say that Dabur Vatika is the original, because Hairveda's was created as an alternate and improved version made for afro textured girls. Dabur Vatika is an Indian hair oil that can be found at almost any Indian market. It's made with a ton of ayurvedic goodies like neem, brahmi, amla, henna, milk, rosemary oil, and lemon oil. This coconut oil is also known for it's distinct smell. To me, it smells like a coconut soap. While it bothers some it doesn't bother me at all. I quite like it! It smells natural--not like a coconut fragrance, but actual coconut. Dabur comes in different sizes, but I usually get the one like in the picture above.

In room temperature coconut oil is solid. how do they expect you to get a solid out of a bottle? The Dabur bottle is microwave safe so that the oil can easily be heated and turned to liquid. I usually heat mine for 15-20 seconds, more if I'm doing a hot oil treatment. The Dabur Coconut Oil I mainly use as a hot oil treatment and prepoo ( before shampooing treatment ). Everyone's hair responds to products differently, and I believe my hair likes it better as a hair treatment and with heat rather than as a sealant. I also like the application of the bottle. it's made so that the oil comes through a tiny punctured hole. This is good because a little oil goes a long way. I only need a drop or two of oil to lightly coat my strands, and that's coming from someone with a lot of hair. The other, more important reason I like the bottle is because it works as a dropper so I can pour it directly on my hair without it getting messy. Putting product directly on your hair, rather than from your hands, has a better effect. I can always feel the difference. This is how I see many girls of Indian heritage oil their hair.


VATIKA FROSTING REVIEW: Hairveda's Indian inspired products are more suitable for dryer and curler hair types. Like Dabur it's completely natural and made of ayurvedic goodies, like amla, henna, and lemon. Unlike Dabur Vatika their container is in a jar and not microwavable safe. But there is no need to heat it, just take a scoop of the solidified oil with your finger and lightly spread it in your hand before your hair. It will melt instantly due to your body temperature. Also the smell is greeeeat! It smell's like homemade cake frosting! One of my best smelling hair products. All of Hairveda's products have great smells. and also like Dabur Vatika, a little goes a long way. I've been using the first jar I bought for more than a year now, maybe even two? It also lasts longer than my Dabur Vatika. but that might be because I use it as a sealant rather than for oil treatments, and treatments take more product. Though I might use Dabur as a sealent when I need something lighter or when my hair is getting too shiny, I prefer Vatika Frosting as a daily sealant because it gives my hair more shine and moisture retention.


Sunday, March 24, 2013

apple cider rinse

Posted by Yahya at 1:00 AM 0 comments
MY RECIPE:
2 CUPS water
1 CUPS rose water
4 TBSP apple cider vinegar
1 TBSP any oil
1 TBSP honey

DIRECTIONS: Rinse out regular or deep conditioner out 50-70% then pour apple cider rinse throughout hair, making sure all of it gets saturated. Also be sure to get the scalp as it gently cleanses and restores the ph of the scalp. Leave in for a couple minutes, then half rinse out. Dry hair as usual.


REVIEW: This has had great results on my hair, the main benefit has been shine. Apple cider has a low ph, so it seals the cuticle and traps moisture in the hair strands. But remember, it's not good to do it too often. Apple cider has clarifying-like affects, so it can cause dryness when used too frequently. I started experiencing this when I was doing this every time I washed. My hair was not necessarily becoming dry, but I was no longer getting the same effects I once was. I've also read that using a ACV rinse as a final rinse leave-in will have a better effect on your hair. I've yet to really try that, the most I have done is rinse it out un-thoroughly so that some of it remains in my hair. I would think that using an apple cider rinse as a leave-in would also lead to dryness, and that an aloe vera juice leave-in would be a better substitute since it also has a low ph of 4 and with moisturizing properties. but I can't say because I have not tried it yet.

homemade castile shampoo

Posted by Yahya at 12:52 AM 1 comments
RECIPE:
2 TBSP dr. bronner's castile soap
1 TBSP jojoba oil ( or olive oil )
3/4 CUP water
4 TBSP rose water

 DIRECTIONS: pour over hair like a rinse, letting it soak down and throughout the hair. follow up with a conditioner. castile opens the hair's pores for better deep conditioning, so it's best to finish off with an apple cider rinse, which also has slight clarifying properties, or roux ph corrector so that the pores close back.


REVIEW: the kind that I've used is the liquid peppermint one. they also have one already mixed with rose water, which I might try in the future. I add rose water to my mix as a light moisturizing ingredient. but the peppermint one is nice with a tingling feeling. castile soap is the only natural and sulfate-free shampoo that deeply clarifies hair. usually to really clarify hair sulfate ingredients are needed. even with the peppermint, high ph, and clarifying properties, when mixed properly castile soap isn't drying at all. my hair would feel very good after shampooing with this.

according to the label, the Dr. Bronner's Castile Soap is made of... water, coconut oil, potassium hydroxide ( none remains after saponifying oils into soap and glycerin ), olive oil, hemp oil, jojoba oil , peppermint oil , mentha arvensis extract, citric acid, tocopherol

even if it makes your hair feel nice, castile shampoo should not be used too frequently, at least a month gap. this is not only because castile shampoo is a clarifier, which can dry hair, but because it has a very high ph of 9. this is the reason people with natural curly textures notice their curls lay down more. when using castile shampoo, it's best to take advantage of the open cuticles with a great protein deep conditioning before using a ph corrector, like Roux Porosity Control. if your hair is normal or high porosity, it would help for you to know that protein treatments are more effective when the cuticles are lifted because the molecular protein can enter the hair strand easier. castile shampoo is even better for hair that naturally has a low porosity since it opens the cuticles so moisture can enter easier, and does not sit on top of the hair strands.


black henna gloss ( without indigo )

Posted by Yahya at 12:48 AM 0 comments
INGREDIENTS:
  • 2-4 TBSP henna 
  • 4 TBSP cheapie conditioner 
  • 1-2 TBSP aveda black malva 
  • 2 TBSP vatika coconut oil 
  • 3 TBSP honey or molasses 
  • rose water (optional) 
DIRECTIONS:
  • Detangle, dampen, then oil hair. 
  • Mix 2 tbsp of henna with cold (rose) water in plastic container until the consistency turns pudding like. ( Do not use metal utensils ) 
  • Add conditioners, oils, molasses and honey. 
  • Put on old t-shirt and gloves; and apply to hair immediately. 
  • Pile hair on head and put on plastic cap. 
  • Sit under dryer for 30 minutes on moderate setting, or let it sit on hair for 1-2 hours. 
  • Rinse out and condition, rinse out and condition. Gloves still on. 
  • Follow with deep conditioning. 
  • Clarify hair following week or wash. 
STORAGE:
Henna paste can freeze, but for better color deposit.


PRE-REVIEW:
After doing ALOT of research I finally found a way to darken my hair with a gloss and without having to do a two step with indigo. Thanks to LadyChe, a member that of LHCF who shared the idea. Aveda black malva is a natural conditioner that darkens hair. It's on the expensive side if used alone, but it's life gets extended when using as an ingredient in a glass. I can finally stop looking for hendigo glosses that go darker than dark brown, which doesn't seem to exist. Plus the conditioner diminishes red tones, making it a good match with henna. 

I have yet to try this, so stay tuned.


kimmaytube leave-in

Posted by Yahya at 12:32 AM 1 comments
INGREDIENTS:
2 TBSP hairveda's whipped ends (or any conditioner)
2 TBSP trader joe's spa conditioner (or any conditioner)
4 TBSP aloe vera gel
2 TBSP shikakai cocasta oil
1-2 TBSP jojoba oil
water until desired consistency.


REVIEW: deciding I wanted to stretch my products and use a more liquidy conditioner, I decided to try the kimmaytube homemade leave-in. it's usually used on naturals and used as a leave-in. I use it as a a leave-in and moisturizer. for relaxed heads, it's best to cut the recommended amount of oils in half, like I've done in my recipe above. due to the low ph of the aloe vera juice, or gel, it has good porosity correcting properties. I've been using this a couple months now, and it's been great! my hair feels softer and looks shinier. since it's liquidy, it also doesn't give my hair that greasy, laid down look at the end of the week due eo product builds up.

For those of you who don't know, Kim Love, the inventor of this recipe, is a very popular natural hair guru. Click here to go to her youtube channel called Kimmaytube.


Related Posts Plugin for WordPress, Blogger...
 

pocahontas' hair secrets Copyright © 2010 Designed by Ipietoon Blogger Template Sponsored by Online Shop Vector by Artshare