Showing posts with label recipes. Show all posts

Tuesday, May 26, 2015

liquefied (ayurvedic) shampoo bars

Posted by Yahya at 2:57 PM 2 comments
SHAMPOOING & MOISTURIZING

I haven't talked much about what shampoo and hair cleansing products I use, and it's because I've never been satisfied with any. It's always either too stripping and alkaline or too moisturizing and like a 2 in 1 shampoo-conditioner. Many hair care journey girls use moisturizing shampoos to wash their hair, Creme of Nature Argan Oil Moisture & Shine Shampoo being a popular one. I've tried it, and personally felt it was a little too moisturizing -not for my hair, but for my scalp. When I wash, I want my scalp to be thoroughly cleaned and my hair to be subtly cleaned. The key to healthy hair is a cleaned scalp and moisturized tresses. Naturally kinky hair is usually paired with natural dryness, so the focus is in increasing moisture. But sometimes, I think that many of us forget about the clean scalp part -cowashing and oiling our scalps too much for example. I mentioned this in my How to start a hair care journey post. Nadege from Relaxed Hair Health also recently made a post about being weary of using cleansing conditioners and the like.

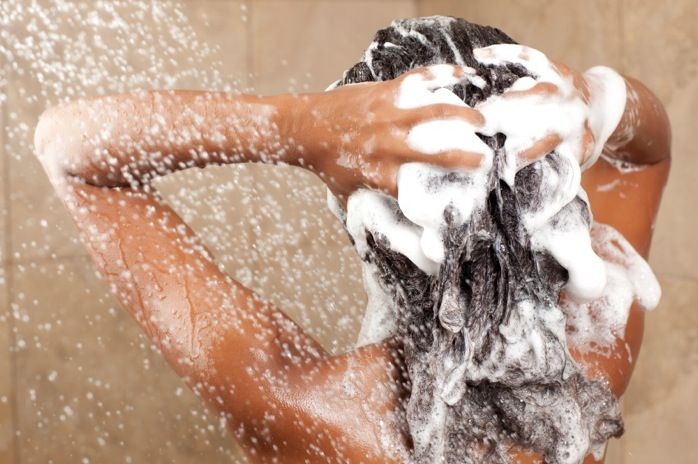
I've tried various ways of shampooing my hair without finding that winner. Many moisturizing shampoos does not clean my scalp as thoroughly as I want it. Indian cleansing powers are very drying, can be time consuming, and the amount of usage needs to be monitored as they strengthen the hair like protein. A heavily diluted castile soap shampoo recipe is still rather alkaline. Cowashing does not properly clean your scalp and is not meant to completely substitute shampooing. Then there are shampoo bars. 

AYURVEDIC SHAMPOO BARS
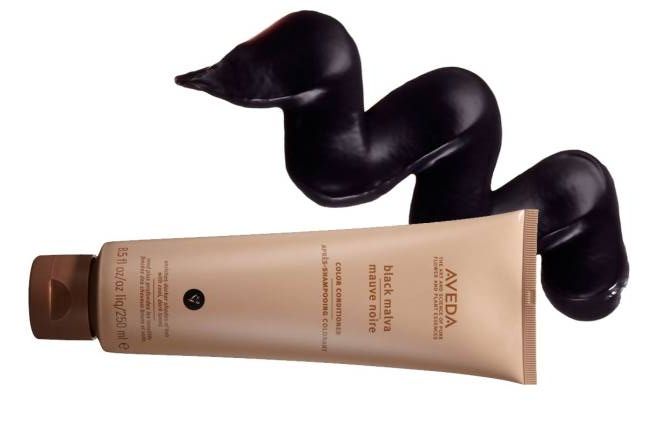
Shampoo bars seem to be the only things I've tried that gently cleanses my hair the way I want. I use ayurvedic shampoo bars from Hairveda, right now I have their Cocasta Shikakai Bar and Red Tea Shampoo Bar in my possession. In my experience, Hairveda is the best hair product line for girls with naturally kinky textured hair, it doesn't matter if you're natural or relaxed. The only downside for me is that I have to buy online and they're products are a little expensive, so I usually wait for their sales because they have quite a few of them. I've been using Cocasta Shikakai since the first time I bought from them and it's been a keeper.


Shampoo bars are what have been working for me so far, the only problem is that they're a bit of a nuisance to use since they're in bar form instead of familiar liquid form. So I googled whether there's a way to liquefy them, and the process is extremely simple.

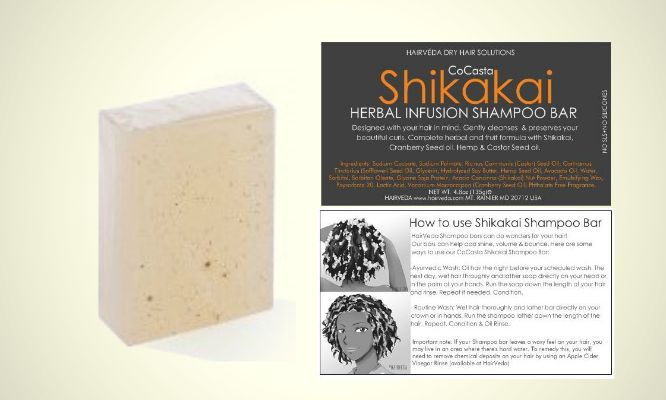
HOW TO LIQUEFY SHAMPOO BARS
RECIPE
1 CUP water
1 TSP glycerin
1 TSP oil of choice
And your shampoo bar.

DIRECTIONS: Grate the shampoo bar with a cheese grater until your soap flakes measure 1 cup. Bring the 1 cup of water to a boil and then pour the shampoo bar flakes into the water. Add the glycerin and your oil of choice into the mixture, I usually use jojoba oil. Stir the mixture and adjust the heat until blended. And lastly, pour your now liquid shampoo into a shampoo bottle. It's that simple.


This round has been my third time doing this, but my first time using Hairveda's newer Red Tea Shampoo bar to do it. I used an old Fruit of the Earth Aloe Vera container, it's the appropriate size and I find the nuzzle easier to use than the usual shampoo nuzzle.

Sunday, November 24, 2013

new growth TLC (stretching touch ups)

Posted by Yahya at 5:55 PM 0 comments
It's been about 25 weeks since my last touch up and I'll be visiting a hair salon very soon. Today I'll be talking about how I stretch my touch ups and care for my new growth when it really starts blooming.

Keep hair in low manipulation style 23/7 or solely flat iron new growth. Doing this minimizes the breakage from the line of demarcation. For this particular stretch I kept my hair in a low braid for the majority of the time, I find that low styles are less manipulating than high ones. Keeping my hair tied up really lessens tangles so I can breeze by the week with just finger detangling. Sometimes I'll use a comb, but only on my relaxed length. Usually during a stretch, however, I interchange with flat ironing. I leave at least a 2 week gap between flat ironing sessions. This allows me to have my hair out and be less cautious about combing.


Hold hair while shampooing to prevent tangles. This is the most recent technique I've been doing, and it really helps. Pulling and holding a section of your hair with one hand while the other hand massages the shampoo into your scalp helps keep your hair strands from going this way and that way, cutting the amount of tangling that usually comes with shampooing.

Only thoroughly detangle new growth on wash day ( especially when it isn't flat ironed ). I usually detangle twice on wash days: before washing and thoroughly after washing when it's almost dry. Yes, when it's almost dry. Combing natural kinky hair is usually easiest in the shower, but that does not mix well with relaxed hair. At least not with my hair. The line of demarcation is already weak, and then hair is weakest when it's wet. The farthest I may go is finger detangle under the shower. Combing when my new growth is almost dry works better for me because I stretch the curl and detangle my relaxed hair first.

Coco caramel treatments. This is just my combination of the coconut cream and caramel treatments, aka natural relaxers. Calling them relaxers is an exaggeration, but they do help many girls loosen and really condition their natural hair. They are also often used for better flat ironing. When I start getting deep in my stretch I use them as my deep conditioners, some wash days I only use them on my new growth.

MY RECIPE:
1/2 CUP coconut milk
1 JAR banana food
1 TBSP molasses
3 TBSP honey
2 TBSP coconut oil and grape seed oil
1 TBSP apple cider vinegar
1 TBSP rose petal powder


Don't let new growth curl up when drying, band new growth right after towel drying. When my new growth really starts accumulating I stretch my curl by doing the band method solely on my new growth. I do this with small hair ties and wrap lotion, just because it was something I had on hand and it's easy to distribute. It's important to start on wet hair or it won't take at well. Doing this also aids detangling. I comb out my relaxed length while the bands are still in, resulting in no breakage. Then I take out the hair bands and comb out my stretched out new growth, which is easier because there's less curl and the bottom portion of my hair is tangle free.

Thursday, June 27, 2013

growth aid exams ( how much growth will I get? )

Posted by Yahya at 9:11 PM 1 comments
MEASURING
summer is a time for testing growth aids!

lately when I use growth aids I've been using more than one and so am unable to know what is really contributing to my growth. for example, in my crazy growth overload challenge I got an inch a month, but did not know what was contributing to it. so since it's summer and I have more free time I will be taking advantage of it by testing and recording my growth aids separately, one at a time. I've already experimented with taking zinc supplements for 3 weeks. taking zinc was what I thought contributed to my rapid increase in growth in my recent growth challenge, but surprisingly I did not notice any increased growth rate. I might test it again in the future, but not this summer.

so here is my planned testing schedule (most of them are 3 week long periods):
  • june 20 - july 4 ) cayenne pepper
  • july 7 - 14 ) inversion method
  • july 15 - 29) bamboo tea
  • july 30 - august 13 ) sulfur mn mix
  • august 14 - sept 4 ) green house effect method & natural dry shampoo
  • september 5 - 15 ) cowash, oil rinse, & no manipulation
another reason I'm choosing summer is because hair usually grows a little more in summer weather. hair grows better in warmer seasons because cell division, the cause of hair growth, increases due to increased circulation.
_______________________________
listed here are my updated growth exam posts
update 1
_______________________________


CAYENNE PEPPER
cayenne pepper oil is known to work as a growth aid by increasing the scalp's circulation. there are two chemicals found in the pepper that are thought to contribute to this: capsaicin and quercetin. capsaicin stimulates the follicles, while quercetin brings blood flow to the scalp. girls who have tried it report tingling/burning sensations when they use it, while others report barely feeling anything. most times that I have used my cayenne pepper oil, I also barely feel anything. from what I've read, however, whether you feel stimulation or not the cayenne pepper is still working. this is most likely because the increase in circulation is actually due to the two chemicals present in the pepper and not just the tingling. this looks like a great option if you're too lazy to massage your scalp to increase blood flow like me!

there are some bad reports about very itchy scalps by some healthy hair journey girls, but these reports seem to be from girls who used it too often or were allergic. some people let it sit on their scalp for a week, crazy people that like to live life on the edge! sorry bungee jumpers out there, but I'm pretty sure-footed. to be safe I use it before washing, usually while I prepoo/hot oil. I haven't had any bad reactions.

I've already used it a week ago and had it on my scalp for about 30-60 minutes before washing. I'll be applying again after posting this and will be letting it sit overnight since I haven't noticed much burning, or even tingling all the times I've used this. the oil mix I've used until now was very simple, just cayenne pepper powder and olive oil. but tonight I'm going to add a little more to give it a boost.

MY RECIPE
1 CUP olive oil
2 TBSP cayenne pepper
5 DROPS peppermint oil (optional)
1 TBSP jamacian black castor oil (optional)

note that after mixing your vegetable oil and pepper powder you have to let it sit for a week for it to fully infuse. though I use olive oil, any vegetable oil can be used. I good idea would probably be to use castor oil as the base as it's a growth aid by itself. the cayenne pepper will act as a catalyst, helping the castor oil penetrate the scalp better. if I notice an increase in growth, in the future I'll probably try cayenne pepper powder mixed with jamacian black castor oil. but for now, it's just a tablespoon. 


Sunday, March 24, 2013

apple cider rinse

Posted by Yahya at 1:00 AM 0 comments
MY RECIPE:
2 CUPS water
1 CUPS rose water
4 TBSP apple cider vinegar
1 TBSP any oil
1 TBSP honey

DIRECTIONS: Rinse out regular or deep conditioner out 50-70% then pour apple cider rinse throughout hair, making sure all of it gets saturated. Also be sure to get the scalp as it gently cleanses and restores the ph of the scalp. Leave in for a couple minutes, then half rinse out. Dry hair as usual.


REVIEW: This has had great results on my hair, the main benefit has been shine. Apple cider has a low ph, so it seals the cuticle and traps moisture in the hair strands. But remember, it's not good to do it too often. Apple cider has clarifying-like affects, so it can cause dryness when used too frequently. I started experiencing this when I was doing this every time I washed. My hair was not necessarily becoming dry, but I was no longer getting the same effects I once was. I've also read that using a ACV rinse as a final rinse leave-in will have a better effect on your hair. I've yet to really try that, the most I have done is rinse it out un-thoroughly so that some of it remains in my hair. I would think that using an apple cider rinse as a leave-in would also lead to dryness, and that an aloe vera juice leave-in would be a better substitute since it also has a low ph of 4 and with moisturizing properties. but I can't say because I have not tried it yet.

homemade castile shampoo

Posted by Yahya at 12:52 AM 1 comments
RECIPE:
2 TBSP dr. bronner's castile soap
1 TBSP jojoba oil ( or olive oil )
3/4 CUP water
4 TBSP rose water

 DIRECTIONS: pour over hair like a rinse, letting it soak down and throughout the hair. follow up with a conditioner. castile opens the hair's pores for better deep conditioning, so it's best to finish off with an apple cider rinse, which also has slight clarifying properties, or roux ph corrector so that the pores close back.


REVIEW: the kind that I've used is the liquid peppermint one. they also have one already mixed with rose water, which I might try in the future. I add rose water to my mix as a light moisturizing ingredient. but the peppermint one is nice with a tingling feeling. castile soap is the only natural and sulfate-free shampoo that deeply clarifies hair. usually to really clarify hair sulfate ingredients are needed. even with the peppermint, high ph, and clarifying properties, when mixed properly castile soap isn't drying at all. my hair would feel very good after shampooing with this.

according to the label, the Dr. Bronner's Castile Soap is made of... water, coconut oil, potassium hydroxide ( none remains after saponifying oils into soap and glycerin ), olive oil, hemp oil, jojoba oil , peppermint oil , mentha arvensis extract, citric acid, tocopherol

even if it makes your hair feel nice, castile shampoo should not be used too frequently, at least a month gap. this is not only because castile shampoo is a clarifier, which can dry hair, but because it has a very high ph of 9. this is the reason people with natural curly textures notice their curls lay down more. when using castile shampoo, it's best to take advantage of the open cuticles with a great protein deep conditioning before using a ph corrector, like Roux Porosity Control. if your hair is normal or high porosity, it would help for you to know that protein treatments are more effective when the cuticles are lifted because the molecular protein can enter the hair strand easier. castile shampoo is even better for hair that naturally has a low porosity since it opens the cuticles so moisture can enter easier, and does not sit on top of the hair strands.


black henna gloss ( without indigo )

Posted by Yahya at 12:48 AM 0 comments
INGREDIENTS:
  • 2-4 TBSP henna 
  • 4 TBSP cheapie conditioner 
  • 1-2 TBSP aveda black malva 
  • 2 TBSP vatika coconut oil 
  • 3 TBSP honey or molasses 
  • rose water (optional) 
DIRECTIONS:
  • Detangle, dampen, then oil hair. 
  • Mix 2 tbsp of henna with cold (rose) water in plastic container until the consistency turns pudding like. ( Do not use metal utensils ) 
  • Add conditioners, oils, molasses and honey. 
  • Put on old t-shirt and gloves; and apply to hair immediately. 
  • Pile hair on head and put on plastic cap. 
  • Sit under dryer for 30 minutes on moderate setting, or let it sit on hair for 1-2 hours. 
  • Rinse out and condition, rinse out and condition. Gloves still on. 
  • Follow with deep conditioning. 
  • Clarify hair following week or wash. 
STORAGE:
Henna paste can freeze, but for better color deposit.


PRE-REVIEW:
After doing ALOT of research I finally found a way to darken my hair with a gloss and without having to do a two step with indigo. Thanks to LadyChe, a member that of LHCF who shared the idea. Aveda black malva is a natural conditioner that darkens hair. It's on the expensive side if used alone, but it's life gets extended when using as an ingredient in a glass. I can finally stop looking for hendigo glosses that go darker than dark brown, which doesn't seem to exist. Plus the conditioner diminishes red tones, making it a good match with henna. 

I have yet to try this, so stay tuned.


kimmaytube leave-in

Posted by Yahya at 12:32 AM 1 comments
INGREDIENTS:
2 TBSP hairveda's whipped ends (or any conditioner)
2 TBSP trader joe's spa conditioner (or any conditioner)
4 TBSP aloe vera gel
2 TBSP shikakai cocasta oil
1-2 TBSP jojoba oil
water until desired consistency.


REVIEW: deciding I wanted to stretch my products and use a more liquidy conditioner, I decided to try the kimmaytube homemade leave-in. it's usually used on naturals and used as a leave-in. I use it as a a leave-in and moisturizer. for relaxed heads, it's best to cut the recommended amount of oils in half, like I've done in my recipe above. due to the low ph of the aloe vera juice, or gel, it has good porosity correcting properties. I've been using this a couple months now, and it's been great! my hair feels softer and looks shinier. since it's liquidy, it also doesn't give my hair that greasy, laid down look at the end of the week due eo product builds up.

For those of you who don't know, Kim Love, the inventor of this recipe, is a very popular natural hair guru. Click here to go to her youtube channel called Kimmaytube.


Related Posts Plugin for WordPress, Blogger...
 

pocahontas' hair secrets Copyright © 2010 Designed by Ipietoon Blogger Template Sponsored by Online Shop Vector by Artshare