My name is Khaya, better known by the nickname Yahya. My area of expertise is chemically straightened afro textured hair, but this blog can be appreciated by anyone who is interested in hair care. I'm currently a transitioner, from sodium hydroxide (lye) relaxers to Japanese straightening. (Never heard of this? Not surprising, I'm a rare case.) Stay tuned for hair tips, reviews, and progress on my hair care journey.
This is a style that I came up with about a year or two ago, and it has become one of my most frequent go to styles. I love low manipulation styles, like a easy single braid or two Pocahontas braids, because my hair stays tangled free for long periods of time. The down side, however, was that I didn't like to braid all the way down, I liked the look of my ends out--but at the same time, having my ends exposed would bother me (especially when my ends were thin). After seeing the East Indian inspired paranda braids some girls make from yarn, I was inspired to use scarves (which is better for your hair than yarn) for a time. After wearing scarf braids for a while a light bulb turned on and I had the idea to use synthetic hair.
I've never worn a wig, weave, or any kind of fake hair, so I guess I was hesitant at first. I'm so glad I did follow through on my idea now. What makes this style so great is that it's low manipulation and a protective because it keeps your hair from tangling and your ends are tucked in. Plus it gives you a slight length booth, and for those with thin ends, make yours ends look fuller.
LOW MANIPULATION
& PROTECTIVE STYLE BRAID TUTORIAL
step one - Have your synthetic hair and a hair tie handy.
step two - Braid your hair until the point where you want to insert the synthetic hair, which should be where the ends of the synthetic hair ends a little further than your real ends when aligned.
step 3 - Insert the synthetic hair by holding it at the middle and placing it against two of the three strands being braided (I usually pick the thinner or shorter looking two strands).
step 4 - Continue to braid the hair like normal until you near the end.
step 5 - For the one strand of hair that doesn't have synthetic hair blended into it, borrow synthetic hair from one of the other two.
step 6 - Finish braid until there is only synthetic hair left out and then secure with the hair tie.
And that's it! Writing it makes it sound more complicated then it actually is, hopefully the animated gif helps. I bought my synthetic hair at a local beauty supply for $2-3. The label says 'Glance: Yaky Pony Braids,' and the color is 1B--natural, brown undertone black.
There aren't many of us colored girls with Japanese straightened hair, but over the years I have bumped into a handful. There are those who have made their presence known to me because of my blog, and then there are those I happen to come across--usually on YouTube.
Very recently I was just lurking around YouTube when I saw a familiar face and head of hair. If you follow Nadege from Relaxed Hair Health you might remember this face, too. Stunned by this girl's long and flawless hair, Nadege couldn't help but ask what the girl did to her hair to get it to be like that. This would be her first time hearing of the magical wonders of Japanese straightening. This is actually what led me into becoming a guest blogger on Relaxed Hair Health--to shed light on what Japanese Straightening really is.
Well apparently this mystery girl actually had a YouTube channel. She goes by the name Gabbie and seems to be a well established make-up/ beauty guru.
Now Megan Bowen, I've been subscribed to her channel for a while now. She is an English teacher in Korea and has her hair permed with Korean Magic Straight--which is essentially the same thing as a Japanese Straightening. The main difference is that Japanese straightening is better at straightening, giving you more of the pin straight look. Korean Magic Straight is beneficial if you're looking for more body. Megan introduces her straightened hair in the first video and gives a tour of the actual process in the second.
Lastly, we have Brittany from My Beauty Marc. She does a good job of properly explaining how Japanese straightening works and is one of the scarce Black girls with Japanese straightened hair I've come across that does her treatments at home. Brittany is always changing her hair up, however, so I am not sure if she is still a thio relaxed head.
Does short hair transition from relaxers to japanese straightening easier? In my sorta recent setback post I mentioned the idea, and here's the quote.
"So for those of you relaxed heads out there, be careful if you're planning on transitioning. I've seen other girls transition more gracefully, but now that I think about it they had shorter hair. The ends of their hair not being as old as mine may have something to do with it."
I was thinking out loud as I wrote this, but now I've come across some evidence that supports my theory. Since my last touch-up I've been saying to myself that my bangs (or are they too long to be called bangs? I'm not sure what to call them) are too long and that I have to cut them, but have been constantly putting it on delay. So I can't believe it took me so long to realize this. The long bangs I keep is an example of short hair transitioning to jhs from relaxers.
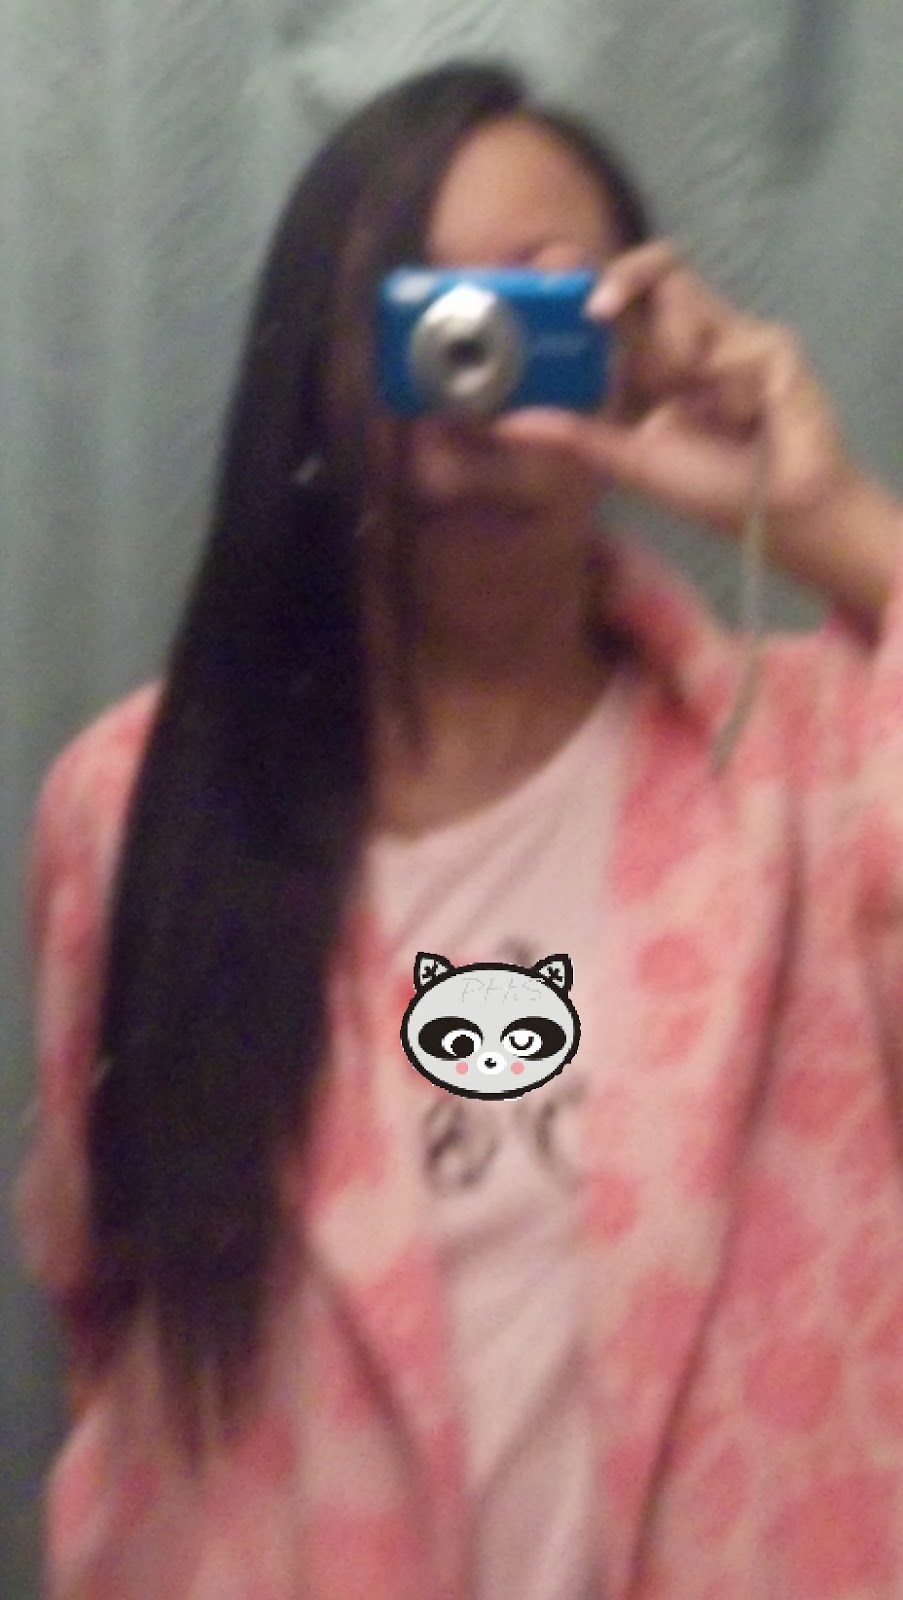
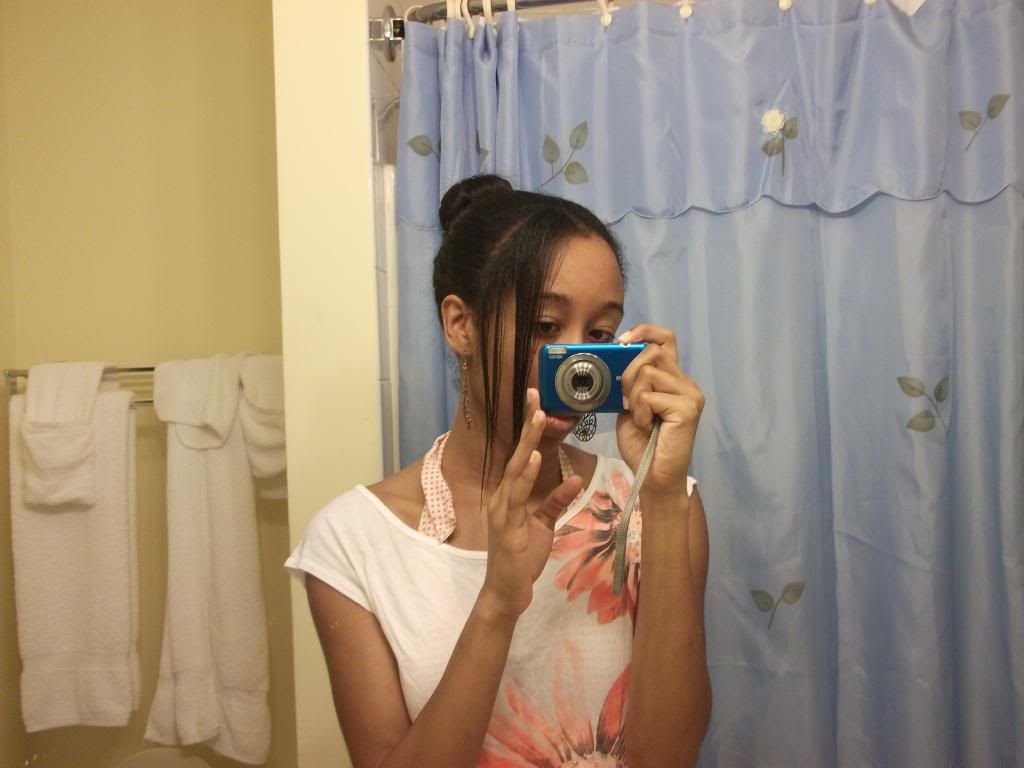
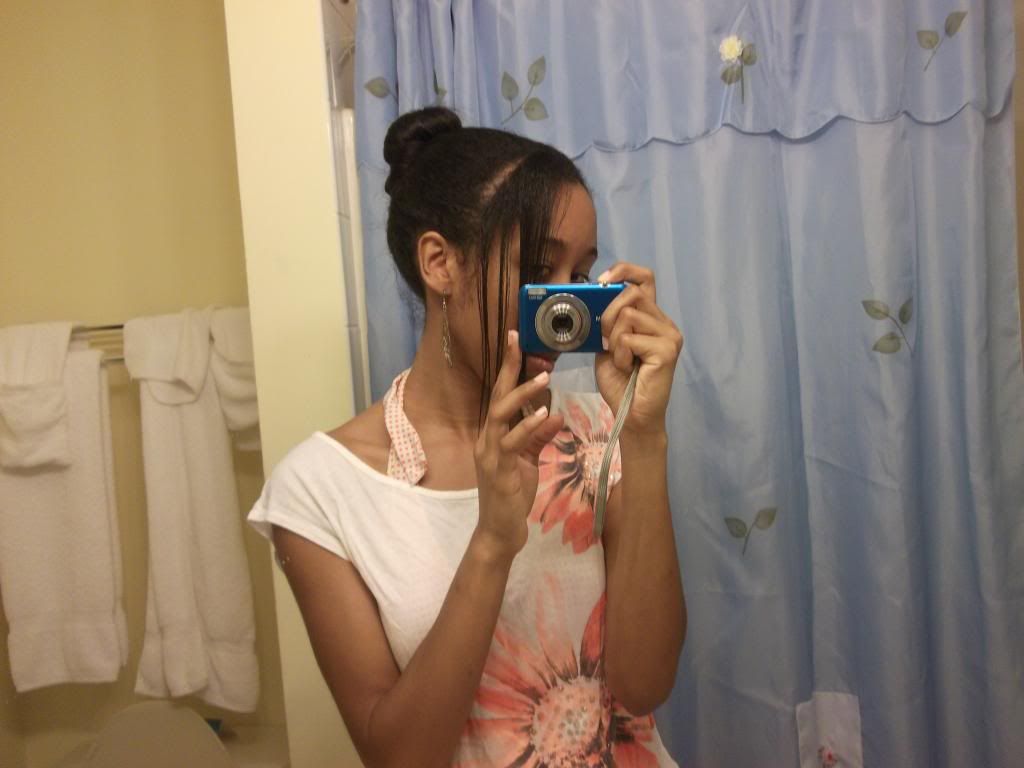
(If you haven't noticed from many of my pictures,
at home I'm always wearing robes.
usually in conjunction with pajamas.)
The first picture was taken after my second, home attempt, jhs touch-up. The second picture was after my most recent third touch-up. You can see the difference in length and the better retention. The point is, my short front hair gains length like normal while my long hair struggles with retention.
OTHER TRANSITIONING TIPS
I've said this many times, but I can never say it enough. Unless you want to be risky, when transitioning from relaxers, it's very important to find a hair stylist that knows what they're doing (that could be you if you know what you're doing) and make sure they use a strong protection cream. Make sure they use a protection cream! (my hair didn't disintegrate or anything after, but I'm still not happy how hair ib just rinsed out the jhs on my naked hair. I think its got more of a brown undertone now from that. If I wasn't so on top of my hair it could have disintergrated.)
I hope everyone had a merry Christmas! I'm so glad to finally be on break, and all the hustle preparing for the holidays are over. Last time I announced I would finally be getting my new growth done at a new salon: Hair IB in New York. I also said I would be trying their unique Japanese Brazilian straightening treatment. So how did it go? Here is the long awaited review and my touch up results.
FASHIONABLY LATE
I set my appointment Wednesday morning so there'd be less people and better focus on my hair. But then my driver came late... and then there was unexpected traffic, even though it wasn't rush hour... I ended up getting there, about an hour late? Luckily they didn't mind and there was only two other clients there. If I came in the evening or on a weekend it might not have been the same story. So the first thing they did was look at my hair, asked questions about my lye relaxed length, and showed me a chart to decide what strength of Brazilian keratin they'll use. Here's how the chart looked like:
Type A
brand: Hair Go Straight
price: $100 (any hair length)
formaldehyde: yes
straightens: 50%
maintenance: must wait 3 days to wash
Type B
brand: Lasio and Coppola
price: $140-$160
formaldehyde: yes
straightens: 50-70% (don't remember, and it's not on the site)
maintenance: must wait 3 days to wash
Type C
brand: Salon Tech Straightening System
price: $160-180
formaldehyde: no
straightens: 90% & up, a lot more shine compared to type A & B
maintenance: can wash right away
Type D
brand: Brazilian Blow Out
price: $180-$200
formaldehyde: no
straightens: 95% & up, shine is similar to type C
maintenance: can wash right away
They recommended that I get type D because of the extremity of my curls, but to me that would have been too much. My ends are already relaxed, why did the extremity of my natural curls matter? I understand type D was also the best quality, but did I really need a 95% curl reduction? I saw from the start they did consider health, but were looking to make my hair stick straight (something I don't particularly like). I might have considered it, but then it cost $20-30 extra, while the other Brazilian keratin types had the fixed JBS price. So I decided to get type 3, the best bang for my buck, and apparently no formaldehyde.
LANGUAGE BARRIER
There were only two fluent English speakers, which made it a little hard to ask questions, but they did answer all of them. Most of them do understand English, but are not fluent. Of the two English speakers was an young Asian girl and a Caribbean-Hispanic wash girl. So for the first step, I got my hair thoroughly washed and detangled. One big concern of mine is having my hair detangled by people not use to kinky curly hair. Plus with Japanese straightening the hair has to be detangled to the point of a fine tooth comb. But they did a decent job, there wasn't much breakage. There could have been less breakage if they started using the fine tooth comb from the ends up and not the middle up, but I was satisfied. Their success was not so much in their technique, but it looked like their tools. They used a brush that looked similar to a tangle teezer.
JAPANESE BRAZILIAN STRAIGHTENING
After detangling the smelly Japanese straightening solution was applied to my new growth. Did I ever mention Japanese straightening smells like rotten alien eggs? They also corrected the parts of my hair that were under processed from last time. But then they wanted to wash out the solution. (Wait, huh? Weren't they going to put the Brazilian keratin on my previously treated length, too?) Turns out the process was different from what I imagined. The Brazilian keratin is applied on the entire head after the Japanese straightening is rinsed. The Brazilian acts as a neutralizer, strengthening treatment, and gives the processing roots straighter results. With this process the hair also only needs to be flat-ironed once, not twice.
- - - - - - - - - - - - - - - - - - - - - - -
Remember, Japanese straightening doesn't break the hair the same as relaxers do. If you need a little recap or if this is your first time hearing this, visit here and here. With the relaxing process, the sulfur bonds are broken and turned into lanthionine bonds. The hair is neutralized and that's the end of the straightening process, the hair has taken a new permanent form. With Japanese straightening the sulfur bonds are only temporarily broken, or rather separated. The neutralizer's purpose is only to help stabilize the hair's new shape, not to wash out the solution. This is why using the Brazilian Keratin as a substitute for a neutralizer is safe, and a pretty smart idea they came up with. Before becoming popular in the natural hair world, the Brazilian keratin was intended to be used on chemically treated hair, for straightening and strengthening, but relaxed heads didn't want to spend so much money to straighten their already practically straight hair.
The last thing I'll say before continuing with my salon day story is that this process, JBS, sounds like a better option for super kinky haired girls looking for definite straight results when they Japanese straighten.
- - - - - - - - - - - - - - - - - - - - - - -
I quickly juggled the pros and cons of the process and realized the only, but serious bad part was that I was going to be rinsed off with no protection. They said online that they'd apply protection cream if they thought my hair needed it, I reminded them that, but they said my hair didn't need it. (Wait, what??) I've been dusting more often, didn't have many split-ends, but my ends did have noticeable wear at the time. I mean, relaxed and Japanese straightened is one of the worst combinations. The two don't go together. I was still trying to process everything when I was getting rinsed. I asked the wash girl to (at least) lift my relaxed length and first focus on rinsing out the Japanese straightening solution, but she said she can only follow orders and I had to ask a higher up. Hard to do that with your hair already soaked in the sink. At the time I didn't worry too much about it though.
They did a great job with processing my new growth. The woman had been checking often to make sure I wasn't over processing. After coming out of the sink my hair was already straight, but not over processed. The Brazilian keratin was then applied throughout my hair, from my just processed roots to my relaxed tips. This was my first Brazilian keratin, and I wasn't expecting my scalp to start burning like a lye relaxer. It wasn't burning that much but I forgot how a burning scalp felt. I got so spoiled on Japanese straightening that I forgot chemical straightening can even burn. She took me to a corner of the salon behind a curtain and opened the back door that was there. She also gave me a cloth to breath in. I knew Brazilian keratins had smoke, but wow, I really forgot how intense chemical straightening can be. You might be thinking, well Japanese straightening is a long complicated process, but it's not intense in the same way. There is no smoke or burning to remind you you're working with chemicals. I kept my face under the cloth for protective measures, but there really wasn't a smell or eye burning or anything. just some smoke. There are many Brazilian keratin brands that lie about not having formaldehyde, but I think the absence of eye irritation confirmed it was formaldehyde free.
The blow dryer setting wasn't too high, it felt between medium and hot, but the blow drying process was long, about a half an hour. Again, this was my first Brazilian keratin, so if something was amiss, do comment and tell me. After that my hair was flat-ironed, and I was impressed with their technique. Two different flat-irons were used, one on high heat and a healthier paneled one with lower heat. The first one was used on my just processed roots and the other one on my previously treated hair with one pass.
And then, I was done!
FINAL THOUGHTS
Thew~ this post turned out much longer than intended, but I didn't want to leave anything out. The whole visit took about 4-5 hours. (Near the end I was starving and thought I smelled fried chicken... turned out it was the flat-iron emphasizing and mixing with the extraterrestrial egg scent, lol >_ _<)
Now I have, give or take, 10 inches of Japanese straightened hair. Some areas were longer, I really should have measured my new growth before the touch up. So is Hair IB club a keeper? I think so, but their only but fatal flaw was, again, not caring enough about my relaxed ends. I fell like I shouldn't have told them my last relaxer was a year and a half ago and that I had usually relaxed 3-4 times a year. It might have given them the wrong idea. If I go there next time, and probably will, I'll make sure they take better protective measures.
My hair was very dull in the shine department coming out of the salon, at first I was disappointed I didn't get that Hair's Talent shine. At home, however, after just applying a little oil, there it was! It was just hiding, since there was no product in my hair. And then after my first wash, a simple shampoo and conditioning, the shine really kicked in. I don't think my hair has ever had this kind of shine. I don't think the picture does the shine justice.
For the past week I've contacted a couple hair salons, wanting to get my hair touched up before the holidays. The first time I Japanese straightened I went to Hair's Talent in Connecticut and they were exceptional, but that came with a high price tag and it was quite a commute. The second time I tried home Japanese straightening. It was much much cheaper and the results were decent, but I did get a little under-processed. It was my first time doing a self touch-up, and I might try home Japanese straightening again in the future after I grow out my relaxer.
So after contacting different salons, Hair IB in New York looked the most promising. They location is reasonable closer, and they're cheap. Their Japanese straightening service has a definite price of $150, the common price for JHS among salons is usually around $300. I made an appointment for their earliest slot on Wednesday. On Yelp one person recommended coming early on a week day so that they are less busy and put more focus on you. below I've listed the good and the bad when making this decision.
PROS
have pictures of afro textured clients
have good reviews on yelp
answered all my questions with the most care and detail out of all the salons I contacted
will do a hair consultation first
told me they can work with relaxed hair, but only with their JBS treatment
cheap
CONS
their cheap price comes from working on several heads at the same time, but hopefully coming in early and on a week day will eliminate this con
most of the stylist are Asian and don't know fluent English, but I did ask for an English speaker to be there during my appointment
from the reviews, they don't trim, they cut.
I mentioned that they will only do their unique Japanese Brazilian Straightening (JBS) on relaxed hair. What in the world is? Talking to them, they said they will not do a Japanese straightening touch up on a head with relaxed hair, because the "product inevitably touches the ends of one’s hair during the course of root touch-ups". I'm not sure if this statement is 100 percent accurate. It kinda depends on how the straightening solution is rinsed out, but they do have a point. You can avoid the chemical touching your ends if your hair is long enough, but the previously treated hair close to the processed roots will get touched. A JBS seems like it's suppose to eliminate this, the roots are Japanese straightened and the already chemically treated hair is given a Brazilian keratin at the same time. It makes sense that these can be done safely at the same time as Japanese and Brazilian treatments do have similar procedures, and Brazilian keratins are compatible with pretty much everything. This will be my first time doing a Brazilian keratin treatment.
So I guess the Brazilian keratin acts as a strengthening and coating when the Japanese straightening solution is rinsed. After consultation they said they would also use a protection cream depending on my hair results. All of this protective methods does make me feel safe, but if it wasn't for the reviews saying the salon is very honest with their recommendations and will even tell you when you don't need something, I would wonder if they were just trying to get more money out of me. They also will not do a Japanese straightening on a head that doesn't pass consultation. I'm glad for that, but hopefully me, with my previously relaxed hair, does pass. I only have minimal breakage from the line of demarcation, but remember, my hair is relaxed, Japanese straightened, and long--so old. That's a lot of wear.
So wish me luck!
( update: It seems we had a misunderstanding and the salon is in fact willing to do a normal JHS touch-up on a head with previously relaxed hair.What they meant was that only with a JBS can they treat all my hair. A JBS is also not done in the manner described here. Click here to see the update. )
It's been about 25 weeks since my last touch up and I'll be visiting a hair salon very soon. Today I'll be talking about how I stretch my touch ups and care for my new growth when it really starts blooming.
Keep hair in low manipulation style 23/7 or solely flat iron new growth. Doing this minimizes the breakage from the line of demarcation. For this particular stretch I kept my hair in a low braid for the majority of the time, I find that low styles are less manipulating than high ones. Keeping my hair tied up really lessens tangles so I can breeze by the week with just finger detangling. Sometimes I'll use a comb, but only on my relaxed length. Usually during a stretch, however, I interchange with flat ironing. I leave at least a 2 week gap between flat ironing sessions. This allows me to have my hair out and be less cautious about combing.
Hold hair while shampooing to prevent tangles. This is the most recent technique I've been doing, and it really helps. Pulling and holding a section of your hair with one hand while the other hand massages the shampoo into your scalp helps keep your hair strands from going this way and that way, cutting the amount of tangling that usually comes with shampooing.
Only thoroughly detangle new growth on wash day ( especially when it isn't flat ironed ). I usually detangle twice on wash days: before washing and thoroughly after washing when it's almost dry. Yes, when it's almost dry. Combing natural kinky hair is usually easiest in the shower, but that does not mix well with relaxed hair. At least not with my hair. The line of demarcation is already weak, and then hair is weakest when it's wet. The farthest I may go is finger detangle under the shower. Combing when my new growth is almost dry works better for me because I stretch the curl and detangle my relaxed hair first.
Coco caramel treatments. This is just my combination of the coconut cream and caramel treatments, aka natural relaxers. Calling them relaxers is an exaggeration, but they do help many girls loosen and really condition their natural hair. They are also often used for better flat ironing. When I start getting deep in my stretch I use them as my deep conditioners, some wash days I only use them on my new growth.
MY RECIPE:
1/2 CUP coconut milk
1 JAR banana food
1 TBSP molasses
3 TBSP honey
2 TBSP coconut oil and grape seed oil
1 TBSP apple cider vinegar
1 TBSP rose petal powder
Don't let new growth curl up when drying, band new growth right after towel drying. When my new growth really starts accumulating I stretch my curl by doing the band method solely on my new growth. I do this with small hair ties and wrap lotion, just because it was something I had on hand and it's easy to distribute. It's important to start on wet hair or it won't take at well. Doing this also aids detangling. I comb out my relaxed length while the bands are still in, resulting in no breakage. Then I take out the hair bands and comb out my stretched out new growth, which is easier because there's less curl and the bottom portion of my hair is tangle free.
Pocahontas braids have always been my second go to style. I consider it more of a low manipulation style rather than a protective because the ends are not tucked away. For those of you that don't know, a low manipulation style is one where your hair requires little handing and keeps the hair from tangling, like braids, where as a protective style is one where your ends are tucked away. I really like braids as a low manipulation style, my only problem is that, especially when my ends aren't thick, seeing my ends loose always bothers me for some reason. Sometimes I braid down my ends and loop them before using a hair tie. Would this be considered more of a protective style? Maybe, kinda. But than I worry that the tension and friction from the hair tie directly on my ends isn't good. Am I worrying too much? Maybe, probably.
So this is how I came up with this idea of using a silk scarf so I could tuck away my ends. This, I would definitely consider a protective style. I've been using this as a protective style very often this month. Usually I have to redo it in the morning or every other day, but because it's also a low manipulation style I don't have to comb. I also sometimes do my hair in a single side braid using a scarf, but here is how I do pigtails.
TUTORIAL
step 1- make sure you have a good sized scarf, the scarf I use is 60 inches long and 12 feet wide.
step 2 - I fold the width of the scarf once or twice and place it on my head. I make sure the ends of the scarf are even and clip one side so the scarf stays put while I braid the other side. the clip in this picture is a little hard to see, it's pink.
step 3 - I take three strands of hair, one of the sections will be braided with the scarf. I've tried only using two strands of hair and the scarf to braid, but didn't like the outcome. the result was too much scarf and not enough hair showing.
step 4 - I braid my hair like normal. when reaching the part where I would normally end the braid with a hair tie I stop and envelop my ends with the scarf.
step 5 - I twist half of the leftover scarf like shown so it's easier to ties into a knot.
step 6 - I tie it off with a knot. you can also envelop your ends and use a hair tie, but I like the look of the knot better.
step 7 - now you just un-clip the other side and redo the process... and you're done!
So I realize I never made a clear update on my Japanese straightening results. To see my first post explaining what Japanese straightening is, click here. Above are pictures of my roots more than a month after the processing. I have a little new growth. these pictures are after clarifying and letting my hair dry without any product (Remember! you should always let your hair dry with product. I did this so you guys could see). As you can see, they didn't come out dead straight like my results from Hair's Talent. The top layer of my hair turned out straight, not dead straight, but straight. However, under there are some texturized pieces. When I put my hair in a bun as it air dries it straightens. I realize several mistakes and things that I probably did wrong, and won't do if I home Japanese straighten next time.
It's important to correct porosity after the process, not before. after clarifying my hair I should not have done a plan apple cider rinse. Not because it would have created a barrier, as it had no oils and I rinsed it out thoroughly, but because higher porosity hair processes better.
At Hair's Talent, they would lightly blow dry the new growth before applying the solution. I'm not sure whether I should have done this. It would have enabled me to apply the solution faster, but it might have also stressed my hair more.
Before applying the straightening solution, though I didn't record it, I recall lightly applying aphogee green tea throughout my hair. This was a careless move as it probably made a barrier on my new growth.
I didn't do a patch test due to the time I thought I had to do the process being shortened.
The girl that was suppose to help me do my hair and sometimes did my relaxers in the past couldn't make it. I have done relaxers on others before, but not on my own head. To try to compensate I had two girls help me. They were use to dealing with afro textured hair before, but never applied a straightening solution.
While applying the solution, I'm not sure if my hair was being stretched and smoothed enough. I also realized half way through that not enough solution was being applied. I feel this, and using aphogee green tea, were the main contributors to my texturized strands. My hair is very thick and coarse and only 60-70% of the jar was used when all of it should have been used.
Before, in my first post about Japanese straightening, I had stated that I realized I was not sure how my processed hair was suppose to look. Apparently my hair was suppose to already look straight, and not have a texturized look.
TECHNIQUE & TEXTURE
Japanese straightening, like sodium hydroxide relaxing, takes skilled hands. proper results depend more on technique. I learned from this, I knew from the start I might get a little wave trying it at home for the first time. On sallybeauty.com's reviews on the product, many girls of other descent and with looser curls noted that their hair didn't become perfectly straight like at the salons. While a girl I know with a texture similar to mine was able to get the dead straight results. So again, technique really counts. Even the kinkiest hair texture can get the dead straight look if they go to an expert.
I also want to go a little more into how to decide how strong your Japanese straightener should be. Curliness, density, and cuticle size needs to be put into consideration. I realize that before I only mentioned curliness. My hair is very thick and coarse, but my hair texture somewhere in the 3b-4a range, not sure. This is why I used One n Only, one of the milder brands, but got its resistant formula. Here is a list of recommendable Japanese straightening kits, which I tried to list from weakest brand to strongest, but this could only be based on reviews I've read as I haven't actually tried all of them: One n Only, Matrix Opti-Smooth, Bio Ionic Retex, Loreal X-Tenso, and Yuko or Liscio (the originals that most salons use). Note that a stronger brand doesn't necessarily mean more damaging to your hair.
WHAT WILL I DO NEXT?
I've really been debating whether I should keep my roots the way it is, or should try to fix it. Like sodium hydroxide relaxers, you can do a corrective. After much thought, I've decided it's not too curly to bother me. I rather have it healthy and wavy than over processed and straight.
I did decide that, unless I change my mind for some reason, I'm going to go to a salon next time. I decided to do this because it might take a few more times to learn to do Japanese straightening and get dead straight results. I'm not sure if I want to go through the trial and error. I would use a stronger Japanese straightening brand, but I'm afraid of negative effects on my sodium hydroxide relaxed length. I also decided to go to a salon because I found a super cheap one that is much closer to me! There price is $170, they Japanese straighten on afro textured hair, and previously relaxed hair! I will be emailing them before going there to test them. The salon is called Organics Hair IB. They also have a helpful page that compares all the different straightening treatments they do.
While blog lurking I found an post written by Nadege from Relaxed Hair Health, regarding her first encounter with Japanese straightened hair. Here is a girl whose hair is an example of how fully Japanese straightened hair looks like! The next time I talk about Japanese straightening will probably be before going to Hair IB, so if there are any questions regarding this subject that I did not mention, please ask!
chlorine and salt water can be very damaging to the hair, they cause dryness and increase porosity. but this doesn't mean you have to skip out of the fun of water during the summer! there's a proper way to prep your hair to help shield it and minimize the damaging effects of chlorine and salt water.
this is just like a pre-poo treatment, except you saturate your hair in fresh water before you apply your oil or conditioner. simple, right? think of the hair cuticle like a cup with a sponge in it. if you go straight into chlorine or salt water the sponge will absorb that damaging water, but if you pour fresh water first the sponge will absorb that and there'll be no room for the damaging water. putting a layer of oil over the sponge will make it even harder for salt/chlorine water to penetrate. that's why I prefer to use oil, rather than conditioner, to prep. it also helps to make sure your hair's porosity is low as it'll make it harder for water to penetrate your strands. remember,
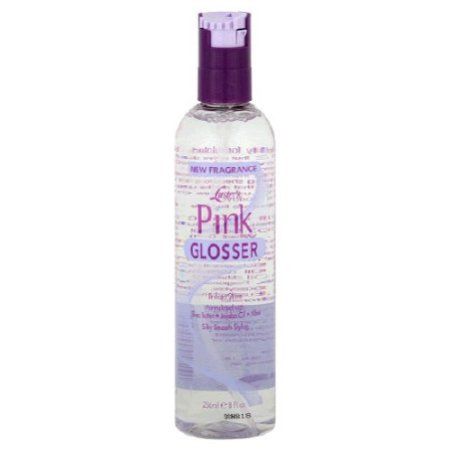
WHAT DO I USE?
I was on vacation to Cayman Island a few weeks ago. I decided to use my miniature luster's pink glosser spray as my pre-pool oil. and I rather liked it, it seemed to get the job done. in the future, when this runs out, I'm going to try to use shea butter oil or other products with shea butter. I choose luster's pink glosser because...
I had it left over from when I first started my hair care journey and wanted to get rid of it
it was small and convenient sized
though it says it's non greasy, but from my memory it was greasy but light
it had shea butter in it. in my past experience, using shea butter in a deep conditioner left a very heavy barrier on my hair, like 5 times the power of a sealing oil. it was so bad that it felt like the shea butter prevented moisture from entering my hair, and I hadn't even used much of it in the deep conditioner!
so after applying my pre-pool products, I usually tie my hair in a single indian braid or a high bun, it depends on how active I'm going to be in the water. here is a picture of me in Cayman Island, before heading to the jacuzzi.
DIFFERENCE BETWEEN RELAXING & JAPANESE STRAIGHTENING
so about half a year ago, November-December, I Japanese straightened for the first time at a salon called Hairs Talent in Connecticut. I choose to Japanese straighten because...
1. it's a much less harmful chemical than relaxing. while relaxers uses sodium hydroxide (ph of 14) or calcium hydroxide or guanidine hydroxide (ph of 9-11). Japanese straightening, on the other hand, uses ammonium thioglycolate, the same chemical used in curly perms. and has a ph of 8-9. 2. the disulfide bonds in the hair are replaced rather than permanently broken. as stated before in hair patterns, "disulfide bonds are two sulfur atoms that are connected to each other. straight hair, which has a rounded cuticle, has disulfide bonds that are aligned and scarce throughout the cuticle. curlier hair has more oval, half moon shaped cuticles and more disulfide bonds that are arranged in a more slanting pattern... sodium hydroxide relaxers work by replacing the original disulfide bonds with a bond called a lanthionine bond, which only has one sulfur bond (this decrease in sulfur bonds gives it a structure more similar to straight hair). curly perms, on the other hand, work on the hair by forming new disulfide bonds with two sulfur atoms".
when using ammonium thioglycolate, whether in a curly perm or Japanese straightening, the sulfur bonds are temporarily broken and than reattached back, while in a sodium hydroxide relaxer the sulfur bonds are permanently broken because they're turned into lanthionine bonds where there is no longer two sulfur atoms, but one.
3. less product usage. because there isn't as much protein and moisture lost, and the hair porosity isn't raised as much, less deep conditioning, leave-in, and "fixing" is needed. the health of the hair is more stable compared to relaxed hair. think of the extent of damage like dyed naturally straight hair, this is the amount of care it'll need.
4. straighten curl rather than relaxed curl. rather than a relaxed curl, Japanese straightening literally straightens your hair. your hair does not have the personality of curly hair, no frizz. you can air dry your hair and no frizz. as my hair has been getting longer I wanted a little less volume and less detangling.
after blow drying at Hair Talents
Japanese straightened roots--Relaxed length
5. stronger line of demarcation. even though the texture difference is increased there is less breakage when stretching compared to relaxers, making transitioning easier. also, you can put a curly perm over your straightened hair is you ever want to go curly, because the two processes use the same chemical.
NOW THE BAD
you are suppose tohave at least 3 inches of growth to do it, if your Japanese straightening your whole head and have split ends it can make your ends look fried (usually people cut an inch off after the process, but this doesn't happen with touch ups); theprocess is lengthy and can take from 3-6 hours depending of your hair; it's hard to do it yourself, especially if you're not use to applying stuff on yourself, it's better to have 4 hands when applying this; it's a new thing so thereisn't that much information about it in the hare care journey community, especially because of the myth that it can't be done on afro hair; and at salons it's expensive. veeeery expensive.
WHY JAPANESE STRAIGHTENING ISN'T "SUITABLE" FOR AFRO HAIR
the reason it's said that it's not suitable for afro hair is because you most likely, especially is your doing it yourself and isn't being done by a hair style expert, won't get the dead straight results Japanese straightening promises. it's suppose to give you shiny straight hair like the typical Asian hair. kinky hair will have a more subtle shine and not be poker straight and the kinkier your hair, the more likely you'll get a little wave. but to me, that's ridiculous! the results are still better than relaxed hair, and you can always lightly flat-iron if you want that pin straight look! and I'm sure most girls here don't even want that pin straight look! if you Japanese straighten to get pin straight hair, know that it will be harder to hold a curl. to get the texture you want, you can judge your curl type and get a resistant, normal, or mild formula.
WANT INFORMATION FROM AN EXPERT?
Japanese straightening goes by many other names: thio relaxer, thermal reconditioning, thermal relaxer, etc. as stated before, there is not much information about Japanese straightening in our community. I myself have now only straightened my hair using this solution twice. once at the salon and once at home. I know a lot on the subject, but I am not an expert. still learning. so I might not now all answers if asked for advise. (sorry!) here is a site I found of a stylist who is very educated on the subject and has a forum where he gives very educated answers to thio relaxed heads. the website is called Verticals in Hair. he really gets deep into the science behind straightening. Hairs Talent, which is on youtube, is also a good place to get more information about Japanese straightening as the main stylist is also an expert. there are many videos showing that Japanese straightening can be done on afro textured hair. and here is an example:
notes: one, she's not applying the solution throughout the hair, she's applying a protection cream on the preciously treated hair. two, they are not using gloves because the solution is so mild. three, in the video she doesn't say it, but the little girl's mother didn't have the same hair type and didn't know how to take care of it, but didn't want to relax it. personally, I still think you should wait until age 13 and until your child is mature enough before permanently straightening their hair, because even though hair health isn't an issue as with sodium hydroxide relaxers, the child might grow up with identity issues. but I also understand their situation. and lastly, in the video she's saying bad hair isn't a hair texture, everyone has bad hair, but when you learn how or know how to take care of your hair is when your hair is good hair. good hair is healthy hair that looks good on you. the video didn't get the ratings it deserved due to people misunderstanding what she was saying.
~~~~~~~~
HOME JAPANESE STRAIGHTENING
although I loved the results I got from Hairs Talent, it was just too expensive and far away. but I met someone who also Japanese straightens, LadyAradia from hairlista.com, but does it at home. I had no idea they sold Japanese straightening kits! the two I'm more familiar with is One n Only thermal ionic straightening and Quantum thermal straightener.
I Japanese straightened my roots about a week ago using One n Only thermal ionic resistant formula. at sally's I noticed the thermal kit had an added label that says "keratin" on the box, and I have no idea why. people might confuse it for a Brazilian keratin treatment. it might be because the straightening lotion has four different proteins.
and here is the looong procedure that happened:
20 minutes ) applied roux ph porosity on newgrowth. I had absolutely no breakage doing this thanks to the henna gloss I did last week.
5 minutes ) went under dryer
10 minutes ) used clarifier & plan apple cider vinegar rinse
about 30 min ) airdried instead of blowdrying, applied porosity leave-in on semi damp hair
about 30 min ) detangled hair to the point where a fine tooth comb could pass and divided hair in 8-9 sections. I had been experiencing little breakage when combing during my stretch, especially since using henna the previous week. but since my hair was dry without any real conditioning (the leave-in is very light and liquidy) I did get some breakage at this point.
about 30 min ) applied protection cream on previously treated hair. the protection cream made my feel a little stiff so I was afraid I was getting protein overload since I just hennaed it last week and had no idea what the cream was made of, there was no ingredients on the jar. since it was a chemical protection it could have been filled with heavy proteins.
20 minutes ) starting from back to front, applied straightening lotion on newgrowth
10 minutes ) continued to smooth the newgrowth and apply more lotion to areas that looked like it needed more
20 minutes ) had plastic cap on. processing time always scared me! I was worried because the back of my head had the lotion on for 50 minutes, but my front 30, but than again the back of my head is curlier than the front. though the directions say up to 30 minutes, I read reviews with people going longer like 45 minutes. I also realized I wasn't sure how it should look when processed. when I saw the curl was loosened and wavy-ish was when I thought it was processed, but my mother thought it was suppose to be straight.
13 minutes ) I rinsed my head for 7 minutes, lifting my hair so it wouldn't rinse into my relaxed length. then I let my hair down and continued rinsing. I was relieved at this point because my relaxed length felt moisturized rinsing out the protection cream, and from this point forward I've experienced no breakage. at this point my hair still had some texture to it.
about 1 hr 30 min ) I applied the porosity leave-in and aphogee again, then blow dried the roots of my hair, which was very easy, to 80% dry. my roots were flat ironed in skinny pieces and a 90 degree angle using a corioliss ceramic flat iron (I used a ceramic instead of a tourmaline ceramic because ceramics flat iron straighter ). and THEN I lightly flat ironed the rest of my hair using my fhi go styler tourmaline ceramic iron (I'm still not perfectly sure why the whole head has to ironed, but better safe than sorry). my hair, especially my roots, looked pin straight at this point.
20 minutes ) I saturated my hair with the neutralizer, especially the roots (the whole head is suppose to be neutralized even with a touch up). at this point my hair didn't revert back to how it looked when I first rinsed out the straightening lotion, but it didn't stay pin straight either. it looked like it has it had a flattened wave, if that makes sense.
about 30 minutes ) I let the neutralizer sit for about 10-20 minutes and rinsed out my hair for 7 minutes. I than used the rest of my apple cider vinegar rinse since I had left over and didn't want to use a conditioner. using a conditioner is optional but using one can hinder the final results of your hair if your trying to go for a more straight look. but I felt the acv make a big difference in the smoothness of my hair. I only rinsed out half of it and left in as a leave-in.
45 minutes ) I applied the leave-in and aphogee once more, blow dried my roots with my fingers, and lightly flat-ironed them with my fhi go styler (on about 200 degrees). finally done!
What determines hair texture? What's the structural differences between straight hair and curly hair? Truthfully science doesn't have all the answers to this subject yet. For example, why does hair texture change in some individuals as they get older? When I was younger, I think I had a looser curl pattern than the one I have now. A common guess to why hair texture changes is the changes in our hormones, but this is just an educated guess. There are several known factors that contribute to different hair textures: follicle shape, disulfide bonds, and sebum flow.
SHAPES
The shape of our hair cuticles are a result of the shape of our scalp's follicles. Hair that grows out of round follicles will have a rounded cuticle, thus straighter hair. Hair the grows out of crescent moon shaped follicles will take on a more oval shape, thus curlier hair. A good metaphor I read that paints a good picture is to think of it like the type of ribbon you use as a balloon tail. When you pass a scissor blade pass one side of the ribbon it curls up. This is the same concept as a hair strand passes through the half moon shaped follicle.
BONDS
As stated before in how do relaxers work, "Disulfide bonds are two sulfur atoms that are connected to each other. Straight hair, which has a rounded cuticle, has disulfide bonds that are aligned and scarce throughout the cuticle. Curlier hair has more oval, half moon shaped cuticles and more disulfide bonds that are arranged in a more slanting, zigzag pattern."
Hair is comprised of almost 90 percent keratin protein and 3 percent moisture. Hair is also made up of 4 different chemical bonds: peptide, disulfide, salt, and hydrogen. Getting into some chemistry, disulfide bonds are the second strongest chemical bonds in the hair, and are also called sulfur bonds. Polypeptide bonds form the keratin proteins found in hair, are the strongest bonds, and are also called keratin bonds. A disulfide bond is created when two sulfur atoms from two neighboring polypeptide bonds connect. Flatter, oval shaped cuticles are able to hold more cysteines, which is an amino acid containing sulfur, and allow them to come in contact with one another. And so with more sulfur atoms coming into contact, more disulfide bonds are able to be created, stabilizing the curly hair structure. A hair cuticle with a rounded structure, on the other hand, has less sulfur atoms and so allows less disulfide bonds.
Unlike two of the other hair bonds mentioned, disulfides bonds are not broken by heat or water. Disulfide bonds, being one of the strongest bonds, is one of the reasons why our hair reverts back to out normal texture after straightening with heat or saturating our hair with water. It's what stabilizes our hair structure. Disulfide bonds can only be altered by chemical processes. It is why once we chemically treat our hair with relaxers and perms the change in texture is permanent.
Sodium hydroxide relaxers work by replacing the original disulfide bonds with a bond called a lanthionine bond, which only has one sulfur bond. Curly perms, on the other hand, work on the hair by forming new disulfide bonds with two sulfur atoms. Japanese straighteners (aka thio relaxers) use the same chemical as curly perms, but is able to straighten the hair. This is something I'm doing more research on.
AND FLOW
This is a topic where much more research still needs to be done. Our hair follicles contain sebaceous glands, which are glands that produce sebum (our natural oil) to lubricate our skin and hair and keep it supple. Our body's natural oil traveling from our scalp to the ends of our hair is commonly known as sebum flow. It's harder for sebum to flow through curlier hair, however, which makes sense because the oil has to slide around a spiral rather than a straight line. It makes me think of a kid trying to use a playground spiral slide, but you know how sometimes you found you had to slide yourself on those things? This is why curlier hair tends to be less oily than straighter hair. And then this is why curly hair tends to have a higher porosity than straight hair, because there is not as much oil to slick down the cuticle. The lack of sebum laying down the hair is why curly hair has more volume and frizz. The laying down of the hair strands also adds weight to the hair, which can result in a slightly looser hair texture.
There are healthy hair journey girls that take silica supplements for better hair growth and health notice that their hair texture becomes looser. There hasn't been much research for why, but an educated guess I have is that maybe there's an increase in sebum. Many of these girls that report a different hair texture also report that their hair feelings more nourished, which would be a result of sebum. I will also be trying out silica in the near future. Probably within a month.
Mix 2 tbsp of henna with cold (rose) water in plastic container until the consistency turns pudding like. ( Do not use metal utensils )
Add conditioners, oils, molasses and honey.
Put on old t-shirt and gloves; and apply to hair immediately.
Pile hair on head and put on plastic cap.
Sit under dryer for 30 minutes on moderate setting, or let it sit on hair for 1-2 hours.
Rinse out and condition, rinse out and condition. Gloves still on.
Follow with deep conditioning.
Clarify hair following week or wash.
STORAGE:
Henna paste can freeze, but for better color deposit.
PRE-REVIEW:
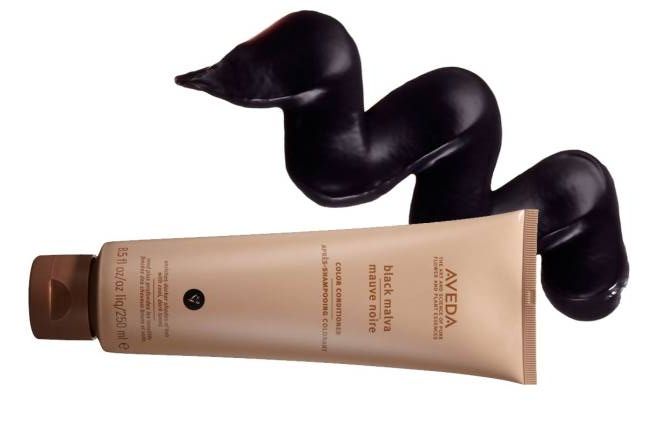
After doing ALOT of research I finally found a way to darken my hair with a gloss and without having to do a two step with indigo. Thanks to LadyChe, a member that of LHCF who shared the idea. Aveda black malva is a natural conditioner that darkens hair. It's on the expensive side if used alone, but it's life gets extended when using as an ingredient in a glass. I can finally stop looking for hendigo glosses that go darker than dark brown, which doesn't seem to exist. Plus the conditioner diminishes red tones, making it a good match with henna.


