Showing posts with label ayurvedic. Show all posts

Wednesday, August 19, 2015

henna gloss & tea rinse (wash day)

Posted by Yahya at 2:43 PM 20 comments
I did quite a few things my last wash day.
  1. If you follow me on Instagram, you know I suddenly decided to try bangs. 
  2. It was protein wash day, so I continued my protein layering regimen.
  3. And lastly, I did a tea rinse (with garlic) to decrease shedding.  

With my current schedule my wash days have been on Thursday, so this'll be a recap. It's been about three weeks since the start of my Protein Layering challenge, and accordingly, I did a protein treatment on the bottom half of my hair last wash. The protein layering method I've been doing is applying protein by gradually working up the hair length every protein wash day (visit here for an illustration).

Aside from protein layering, I've also been focusing on reducing shedding my last few wash days. I've been having an increase in hair loss lately (nothing big, but noticeable) and from analyzing the loss strands I see the majority is shedding. Not sure if it's a seasonal thing or change in my diet, but I've been doing tea rinses to try and combat it (that and trying to remember to take garlic supplements).


Here is what I used on my wash day
  • Tea Rinse/ Prepoo - Created a tea rinse made of fennel tea, hibiscus tea, nettle tea, peppermint tea, and juiced garlic and poured it over my head, focusing on my scalp. That sat for about an hour. 
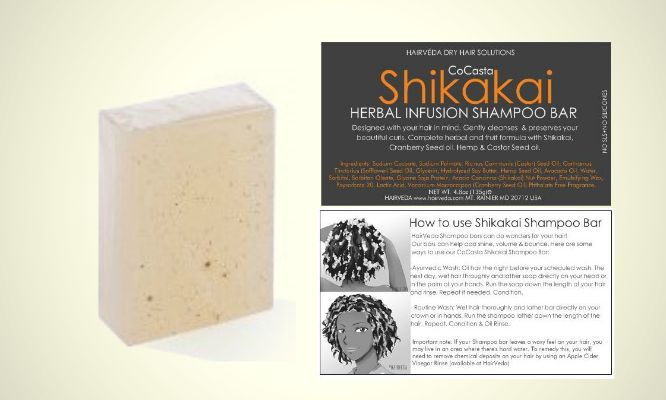
  • Cleanse - Shampooed with Creme of Nature's Argan oil Shampoo
  • Oil Rinse - Poured some grape seed oil over my hair while still in the shower, wanting it to be damp and a little oily before applying my henna gloss. 
  • Protein - Did a henna gloss and allowed it to sit for about an hour
  • Condition - Deep conditioned with Aubrey Organic's Honeysuckle Rose Conditioner for about two hours
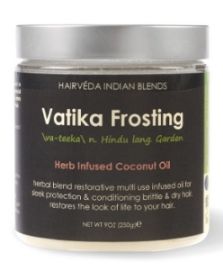
  • Moist - Finished of with my diluted Kimmaytube leave-in and Vatika Frosting
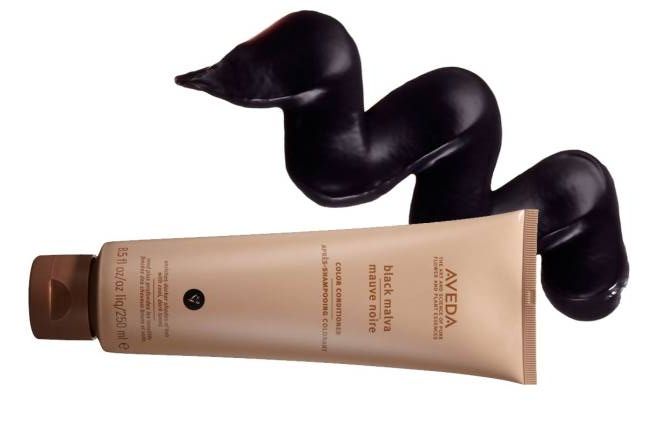
BLACK HENNA GLOSS
If you follow the henna gloss link above, you'll see I use Aveda's Black Malva Conditioner in it in attempt to get darker undertones. I have never updated how this idea worked for me because, well, I still don't know if it works. I've been having a dilemma of trying to take before and after pictures of my hair's undertones. From what I can tell from the before and after pictures I attempted to take this wash, there isn't much of a difference. Maybe next time I attempt it I'll do it more like a two step henna treatment, using the black malva instead of indigo. 

TEA RINSE
The hair care knowledgeable might have noticed I didn't use black tea in my mix, when it's the most known tea to help combat shedding. Black tea rinses have helped me in the past when I noticed an increase in shedding, but recently, not so much. When I first started doing tea rinses to combat this period of increase shedding, I was only using black tea. I wasn't noticing any improvement this time, not sure why. With the fennel, nettle, and garlic juice mixture I have now, however, I have noticed slight improvement. I plan on continuing to change it up though, until I find the tea rinse recipe that works best for me.  

The Wash Day Experience


Tuesday, May 26, 2015

liquefied (ayurvedic) shampoo bars

Posted by Yahya at 2:57 PM 2 comments
SHAMPOOING & MOISTURIZING

I haven't talked much about what shampoo and hair cleansing products I use, and it's because I've never been satisfied with any. It's always either too stripping and alkaline or too moisturizing and like a 2 in 1 shampoo-conditioner. Many hair care journey girls use moisturizing shampoos to wash their hair, Creme of Nature Argan Oil Moisture & Shine Shampoo being a popular one. I've tried it, and personally felt it was a little too moisturizing -not for my hair, but for my scalp. When I wash, I want my scalp to be thoroughly cleaned and my hair to be subtly cleaned. The key to healthy hair is a cleaned scalp and moisturized tresses. Naturally kinky hair is usually paired with natural dryness, so the focus is in increasing moisture. But sometimes, I think that many of us forget about the clean scalp part -cowashing and oiling our scalps too much for example. I mentioned this in my How to start a hair care journey post. Nadege from Relaxed Hair Health also recently made a post about being weary of using cleansing conditioners and the like.

I've tried various ways of shampooing my hair without finding that winner. Many moisturizing shampoos does not clean my scalp as thoroughly as I want it. Indian cleansing powers are very drying, can be time consuming, and the amount of usage needs to be monitored as they strengthen the hair like protein. A heavily diluted castile soap shampoo recipe is still rather alkaline. Cowashing does not properly clean your scalp and is not meant to completely substitute shampooing. Then there are shampoo bars. 

AYURVEDIC SHAMPOO BARS
Shampoo bars seem to be the only things I've tried that gently cleanses my hair the way I want. I use ayurvedic shampoo bars from Hairveda, right now I have their Cocasta Shikakai Bar and Red Tea Shampoo Bar in my possession. In my experience, Hairveda is the best hair product line for girls with naturally kinky textured hair, it doesn't matter if you're natural or relaxed. The only downside for me is that I have to buy online and they're products are a little expensive, so I usually wait for their sales because they have quite a few of them. I've been using Cocasta Shikakai since the first time I bought from them and it's been a keeper.


Shampoo bars are what have been working for me so far, the only problem is that they're a bit of a nuisance to use since they're in bar form instead of familiar liquid form. So I googled whether there's a way to liquefy them, and the process is extremely simple.

HOW TO LIQUEFY SHAMPOO BARS
RECIPE
1 CUP water
1 TSP glycerin
1 TSP oil of choice
And your shampoo bar.

DIRECTIONS: Grate the shampoo bar with a cheese grater until your soap flakes measure 1 cup. Bring the 1 cup of water to a boil and then pour the shampoo bar flakes into the water. Add the glycerin and your oil of choice into the mixture, I usually use jojoba oil. Stir the mixture and adjust the heat until blended. And lastly, pour your now liquid shampoo into a shampoo bottle. It's that simple.


This round has been my third time doing this, but my first time using Hairveda's newer Red Tea Shampoo bar to do it. I used an old Fruit of the Earth Aloe Vera container, it's the appropriate size and I find the nuzzle easier to use than the usual shampoo nuzzle.

Friday, March 29, 2013

my vatika coconut oils

Posted by Yahya at 6:41 PM 1 comments
Coconut oil is one of the most popular, if not the most popular, hair oil used by healthy hair journey girls. Why? Coconut oil is commonly mistaken as a moisturizer, but in reality oils can not moisturize the hair because oil is not water soluble. How can something that doesn't contain water moisturize the hair? Moisturize means adding moisture--the presence of water. The reason coconut oil is commonly confused as a moisturizer is because of it's unique properties. Out of all the oils, coconut is the most penetrating and nourishing, the closest thing to an oil being moisturizing.

Another unique benefit of coconut oil is its ability to retain the protein in hair. This is great for anyone with chemically treated hair. This is because protein is lost during chemical processes, especially with hydroxide relaxing. Regular protein treatments must be done in order to restore our hair's keratin and using coconut oil helps make the protein fillers last longer.

There are two brands of coconut oil I use: Dabur Vatika Coconut Oil and Hairveda Vatika Frosting.

vs. 

DABUR VATIKA REVIEW: You can say that Dabur Vatika is the original, because Hairveda's was created as an alternate and improved version made for afro textured girls. Dabur Vatika is an Indian hair oil that can be found at almost any Indian market. It's made with a ton of ayurvedic goodies like neem, brahmi, amla, henna, milk, rosemary oil, and lemon oil. This coconut oil is also known for it's distinct smell. To me, it smells like a coconut soap. While it bothers some it doesn't bother me at all. I quite like it! It smells natural--not like a coconut fragrance, but actual coconut. Dabur comes in different sizes, but I usually get the one like in the picture above.

In room temperature coconut oil is solid. how do they expect you to get a solid out of a bottle? The Dabur bottle is microwave safe so that the oil can easily be heated and turned to liquid. I usually heat mine for 15-20 seconds, more if I'm doing a hot oil treatment. The Dabur Coconut Oil I mainly use as a hot oil treatment and prepoo ( before shampooing treatment ). Everyone's hair responds to products differently, and I believe my hair likes it better as a hair treatment and with heat rather than as a sealant. I also like the application of the bottle. it's made so that the oil comes through a tiny punctured hole. This is good because a little oil goes a long way. I only need a drop or two of oil to lightly coat my strands, and that's coming from someone with a lot of hair. The other, more important reason I like the bottle is because it works as a dropper so I can pour it directly on my hair without it getting messy. Putting product directly on your hair, rather than from your hands, has a better effect. I can always feel the difference. This is how I see many girls of Indian heritage oil their hair.


VATIKA FROSTING REVIEW: Hairveda's Indian inspired products are more suitable for dryer and curler hair types. Like Dabur it's completely natural and made of ayurvedic goodies, like amla, henna, and lemon. Unlike Dabur Vatika their container is in a jar and not microwavable safe. But there is no need to heat it, just take a scoop of the solidified oil with your finger and lightly spread it in your hand before your hair. It will melt instantly due to your body temperature. Also the smell is greeeeat! It smell's like homemade cake frosting! One of my best smelling hair products. All of Hairveda's products have great smells. and also like Dabur Vatika, a little goes a long way. I've been using the first jar I bought for more than a year now, maybe even two? It also lasts longer than my Dabur Vatika. but that might be because I use it as a sealant rather than for oil treatments, and treatments take more product. Though I might use Dabur as a sealent when I need something lighter or when my hair is getting too shiny, I prefer Vatika Frosting as a daily sealant because it gives my hair more shine and moisture retention.


Sunday, March 24, 2013

apple cider rinse

Posted by Yahya at 1:00 AM 0 comments
MY RECIPE:
2 CUPS water
1 CUPS rose water
4 TBSP apple cider vinegar
1 TBSP any oil
1 TBSP honey

DIRECTIONS: Rinse out regular or deep conditioner out 50-70% then pour apple cider rinse throughout hair, making sure all of it gets saturated. Also be sure to get the scalp as it gently cleanses and restores the ph of the scalp. Leave in for a couple minutes, then half rinse out. Dry hair as usual.


REVIEW: This has had great results on my hair, the main benefit has been shine. Apple cider has a low ph, so it seals the cuticle and traps moisture in the hair strands. But remember, it's not good to do it too often. Apple cider has clarifying-like affects, so it can cause dryness when used too frequently. I started experiencing this when I was doing this every time I washed. My hair was not necessarily becoming dry, but I was no longer getting the same effects I once was. I've also read that using a ACV rinse as a final rinse leave-in will have a better effect on your hair. I've yet to really try that, the most I have done is rinse it out un-thoroughly so that some of it remains in my hair. I would think that using an apple cider rinse as a leave-in would also lead to dryness, and that an aloe vera juice leave-in would be a better substitute since it also has a low ph of 4 and with moisturizing properties. but I can't say because I have not tried it yet.

black henna gloss ( without indigo )

Posted by Yahya at 12:48 AM 0 comments
INGREDIENTS:
  • 2-4 TBSP henna 
  • 4 TBSP cheapie conditioner 
  • 1-2 TBSP aveda black malva 
  • 2 TBSP vatika coconut oil 
  • 3 TBSP honey or molasses 
  • rose water (optional) 
DIRECTIONS:
  • Detangle, dampen, then oil hair. 
  • Mix 2 tbsp of henna with cold (rose) water in plastic container until the consistency turns pudding like. ( Do not use metal utensils ) 
  • Add conditioners, oils, molasses and honey. 
  • Put on old t-shirt and gloves; and apply to hair immediately. 
  • Pile hair on head and put on plastic cap. 
  • Sit under dryer for 30 minutes on moderate setting, or let it sit on hair for 1-2 hours. 
  • Rinse out and condition, rinse out and condition. Gloves still on. 
  • Follow with deep conditioning. 
  • Clarify hair following week or wash. 
STORAGE:
Henna paste can freeze, but for better color deposit.


PRE-REVIEW:
After doing ALOT of research I finally found a way to darken my hair with a gloss and without having to do a two step with indigo. Thanks to LadyChe, a member that of LHCF who shared the idea. Aveda black malva is a natural conditioner that darkens hair. It's on the expensive side if used alone, but it's life gets extended when using as an ingredient in a glass. I can finally stop looking for hendigo glosses that go darker than dark brown, which doesn't seem to exist. Plus the conditioner diminishes red tones, making it a good match with henna. 

I have yet to try this, so stay tuned.


Related Posts Plugin for WordPress, Blogger...
 

pocahontas' hair secrets Copyright © 2010 Designed by Ipietoon Blogger Template Sponsored by Online Shop Vector by Artshare