Showing posts with label protein. Show all posts

Wednesday, August 19, 2015

henna gloss & tea rinse (wash day)

Posted by Yahya at 2:43 PM 20 comments
I did quite a few things my last wash day.
  1. If you follow me on Instagram, you know I suddenly decided to try bangs. 
  2. It was protein wash day, so I continued my protein layering regimen.
  3. And lastly, I did a tea rinse (with garlic) to decrease shedding.  

With my current schedule my wash days have been on Thursday, so this'll be a recap. It's been about three weeks since the start of my Protein Layering challenge, and accordingly, I did a protein treatment on the bottom half of my hair last wash. The protein layering method I've been doing is applying protein by gradually working up the hair length every protein wash day (visit here for an illustration).

Aside from protein layering, I've also been focusing on reducing shedding my last few wash days. I've been having an increase in hair loss lately (nothing big, but noticeable) and from analyzing the loss strands I see the majority is shedding. Not sure if it's a seasonal thing or change in my diet, but I've been doing tea rinses to try and combat it (that and trying to remember to take garlic supplements).


Here is what I used on my wash day
  • Tea Rinse/ Prepoo - Created a tea rinse made of fennel tea, hibiscus tea, nettle tea, peppermint tea, and juiced garlic and poured it over my head, focusing on my scalp. That sat for about an hour. 
  • Cleanse - Shampooed with Creme of Nature's Argan oil Shampoo
  • Oil Rinse - Poured some grape seed oil over my hair while still in the shower, wanting it to be damp and a little oily before applying my henna gloss. 
  • Protein - Did a henna gloss and allowed it to sit for about an hour
  • Condition - Deep conditioned with Aubrey Organic's Honeysuckle Rose Conditioner for about two hours
  • Moist - Finished of with my diluted Kimmaytube leave-in and Vatika Frosting

BLACK HENNA GLOSS
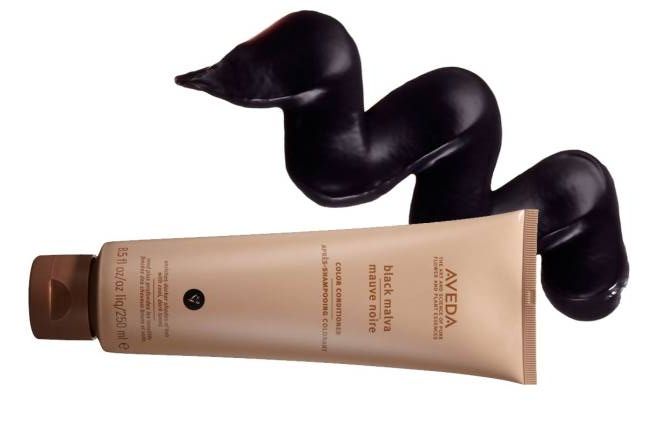
If you follow the henna gloss link above, you'll see I use Aveda's Black Malva Conditioner in it in attempt to get darker undertones. I have never updated how this idea worked for me because, well, I still don't know if it works. I've been having a dilemma of trying to take before and after pictures of my hair's undertones. From what I can tell from the before and after pictures I attempted to take this wash, there isn't much of a difference. Maybe next time I attempt it I'll do it more like a two step henna treatment, using the black malva instead of indigo. 

TEA RINSE
The hair care knowledgeable might have noticed I didn't use black tea in my mix, when it's the most known tea to help combat shedding. Black tea rinses have helped me in the past when I noticed an increase in shedding, but recently, not so much. When I first started doing tea rinses to combat this period of increase shedding, I was only using black tea. I wasn't noticing any improvement this time, not sure why. With the fennel, nettle, and garlic juice mixture I have now, however, I have noticed slight improvement. I plan on continuing to change it up though, until I find the tea rinse recipe that works best for me.  

The Wash Day Experience


Saturday, August 1, 2015

protein layering challenge

Posted by Yahya at 11:00 AM 2 comments

Hey guys, I started a Protein Layering challenge on Hairlista. If you're interested in trying out the method, or already doing it, please join us! The group will be active until the end of November. The only real rules is to create a starting posts explaining your protein layering strategy and to keep your protein and moisture balance stable. To help show examples of different ways protein layering can be done, I made the below animated gifs.

  • This one is my main method. It involves working up the hair every protein wash day. You start with solely protein deep conditioning your the first wash, then working up to two-fouths the hair length the next scheduled protein wash day, then three-fourths the next one, and then your whole head the final one. Then the cycle repeats.
  • This one is inspired by Nadege's method, and unlike the one above, one cycle is done on the same day. The protein treatment is first applied solely to your ends, then a diluted version is applied to the 'lower class' level of the hair. As you work your way up the diluting and letting it sit in your hair steps just repeat for the 'middle class' and 'protein rich' levels of the hair like shown.


Tuesday, July 21, 2015

protein layering (for even strength)

Posted by Yahya at 7:18 PM 9 comments

HAIR HIERARCHY OF NEEDS

Like my first legit infographic? Protein layering is a method, or rather a concept, still stapled to my hair regimen. It has helped my suffering ends with the transitioning from lye relaxers to Japanese straightening. Since sharing this idea, the method has been coined 'protein layering', but technically you don't have to layer protein product in your hair to do it. As shown in the illustration in the link above, I have mostly been doing it by protein deep conditioning my ends one week, then half my hair the next protein wash day, then my whole head the next protein wash day.  

Because all heads of hair has this natural protein hierarchy, protein layering is something everyone can benefit from. Relaxed and fighting a line of demarcation. Natural and afraid of doing full on protein treatments too often. Lye relaxed transitioning to Japanese straightening. Or just wanting even strength throughout your hair length. Protein Layering is also beneficial to individuals that have dry ends who find methods like baggying doesn't work. Such a case would mean that even with the added moisture, the ends have nothing to retain it because of the protein loss.

Below are links to other bloggers that do protein layering. Visit their posts to see examples of the different ways protein layering can be done.


HOW IT'S DONE

Lesley from Fresh Lengths incorporates protein layering into her regimen by doing a protein deep conditioning solely to the bottom half of her hair between normal washes.

KLP from Saving Our Strands uses the concept of protein layering in her protein conditioning by applying a moisture conditioner only to her roots and then using a protein conditioner from the line of demarcation down.

Nadege from Relaxed Hair Health really follows the concept, applying a heavy protein conditioning mix to her ends and then leaving it in for about 15 mins. She then proceeds to dilute her mix and apply it to the rest of her hair.

Petra from Black Hair Information suggests a number of ways to incorporate protein layering into your regimen depending on what your hair needs.

Friday, March 29, 2013

conquering protein overload

Posted by Yahya at 10:59 AM 8 comments
when trying to conquer protein overload the best battle strategy is to only use moisturizing products with no trace of protein. It took me a while to realize many of my moisturizing products, and even shampoos, had traces of protein. I also didn't want to spend a lot of money, so I tried getting the most effective and cheapest products I could. below I've listed how I changed my regimen to combat protein overload, listed from the most helpful.


PRODUCTS
  • Hairveda Whipped Ends 
    • very good leave-in, a little expensive with shipping, especially if you're buying it alone. the shipping for american residents is about 7 dollars.
  • Hairveda Sitrinillah
    • also very good, but can be expensive with shipping like the whipped ends.
  • Aubrey Organics Honeysuckle Rose 
    • also kinda expensive, but it was the most effective in reversing my protein overload. I used it as a deep conditioner and diluted it to use as a leave-in to stretch the dollar. this is also easier to get, usually found at your local vitamin shoppe. 
  • Queen Helene Cholesterol 
    • has mineral oil, but was very helpful. breakage is associated with protein overload because the hair is stiff and has little elasticity, but cholesterol helps restore elasticity. one thing that people may not like though, is that it has a distinct smell. to me, it smelled like the ferret shampoo I use to bath my ferret with. so I actually liked it because it brought back memories! 
  • Honey & Molasses 
    • cheap ingredients to add to conditioners to give them a moisture boost.
  • Mane n Tail Detangler 
    • helped detangling, because protein overloaded hair tends to stick together, making it knot easily. I only used it a couple days before washing because it has cones, which will not mix good with protein overload if there is a build up. 
  • Suave Almond & Shea Butter 
    • simple cheapie conditioner with no protein
REGIMEN
  • deep condition or co-wash once a week with steam 
    • helps the conditioner to penetrate the barriers of protein. I used the steam from my college's steam room and sauna.
  • clarify (with castile soap and jojoba oil) every two weeks 
    • clarifying dries the hair, but it also gets rid of the traces of protein product coating your hair. product build up is also not a good combination with protein overload. the castile soap also opens your hair's cuticles to take in moisture better. just make sure to close them back afterwards. 
  • final apple cider vinegar rinse 
    • to keep the hair's ph balance stable since I could no longer us roux ph corrector, which has protein in it. this also helps to keep the scalp clean when co washing and seals in the moisture after deep conditioning and using castile soap.
  • baggying & wet bunning
    • baggying excessively is one of the top things that really helped me. if I didn't do excessive baggying and wet bunning I'd still have protein overload ( wet bunning is when you bun your hair after washing and conditioning it, so that the hair stays wet and moist longer ). what finally got rid of my last traces of protein overload was when I left a bag on for 3 days in a row! with a good leave-in 
  • protective styling 
    • I kept my hair in braids (at least 8 total), and later twists. I found the twists worked better from keeping my hair from tangling. I also kept them in the shower because that's when my hair would really tangle. the only times I took them out was to detangle and moisturize my hair. 
THINGS I LEARNED
  • not to pile your hair with moisturizer or conditioner, because that just creates build up. being light handed and not heavy handed is more effective. 
  • stay far away from all protein ingredients, even if it's a little bit. especially from any hydrolyzed protein, which means the protein is small and molecular so it can penetrate the hair better. 
  • stay away from coconut, avocado, and banana ingredients, especially as a leave-in. coconut helps keep the protein in you hair, and all of them have little traces of protein. 
  • don't use any ayurvedic powders like amla, shikakai, and henna, because they all have strengthening properties like protein. 
  • extra virgin olive oil and grapeseed oil are the best oils to seal with. especially with relaxed hair because they're light, but penetrating.


Sunday, March 24, 2013

black henna gloss ( without indigo )

Posted by Yahya at 12:48 AM 0 comments
INGREDIENTS:
  • 2-4 TBSP henna 
  • 4 TBSP cheapie conditioner 
  • 1-2 TBSP aveda black malva 
  • 2 TBSP vatika coconut oil 
  • 3 TBSP honey or molasses 
  • rose water (optional) 
DIRECTIONS:
  • Detangle, dampen, then oil hair. 
  • Mix 2 tbsp of henna with cold (rose) water in plastic container until the consistency turns pudding like. ( Do not use metal utensils ) 
  • Add conditioners, oils, molasses and honey. 
  • Put on old t-shirt and gloves; and apply to hair immediately. 
  • Pile hair on head and put on plastic cap. 
  • Sit under dryer for 30 minutes on moderate setting, or let it sit on hair for 1-2 hours. 
  • Rinse out and condition, rinse out and condition. Gloves still on. 
  • Follow with deep conditioning. 
  • Clarify hair following week or wash. 
STORAGE:
Henna paste can freeze, but for better color deposit.


PRE-REVIEW:
After doing ALOT of research I finally found a way to darken my hair with a gloss and without having to do a two step with indigo. Thanks to LadyChe, a member that of LHCF who shared the idea. Aveda black malva is a natural conditioner that darkens hair. It's on the expensive side if used alone, but it's life gets extended when using as an ingredient in a glass. I can finally stop looking for hendigo glosses that go darker than dark brown, which doesn't seem to exist. Plus the conditioner diminishes red tones, making it a good match with henna. 

I have yet to try this, so stay tuned.


Related Posts Plugin for WordPress, Blogger...
 

pocahontas' hair secrets Copyright © 2010 Designed by Ipietoon Blogger Template Sponsored by Online Shop Vector by Artshare